Wednesday, October 31, 2007

Rudeshiem


Location: Rudesheim, Germany
Weather: 55, sunny
The photo: from Amsterdam, actually. A frequent scene, as bicycles are a popular mode of transport for the locals. Parking places are strictly monitored there, and permits are very expensive.


The internet connectivity on the ship is sometimes marginal. They actually have a "ship computer," a laptop, that passengers can check out, like a library book, for an hour at a time. I brought my own. Anyone wanting to use the internet must purchase a 10 euro ticket which gives one hour of internet time. When that's used up, you buy another. It takes awhile to connect, to log in through the ship's wlan, and each page takes a loooong time to load. What little I've done to date has taken 50 minutes of my hour. I compose my postings offline and quickly cut and paste it once I get connected. Photos take awhile to upload, and re-directing to other web pages are also time consuming.

What we do, as with most cruises, is eat, walk around a little, read a little, eat again, and repeat, sleep and repeat. The food on board is fairly good. Not exceptional, but certainly better than some. The chef uses every morsel of food from each meal. Leftover green beans, you say? Ah, add them to some ground meat, roll them in some kind of flat bread (that isn't a tortilla, but more like lebanese flatbread that's been softened), cover in sauce and cheese, bake and call it Tex-Mex Roll-Ups. Some mixed vegetables? They become garnish for the lunch dish the next day. Two nights in a row I've had fish of varieties I don't know. Last night was limande. Have no idea what it was, except thin white fish.

Today we cruised the Rhine and looked at dozens of castles. Some in ruins, most restored and functioning as hotels. A few are privately owned. One we saw is owned by a company in Berlin and not open to the public. Now I ask you, what does a Berlin company want with a castle on the Rhine? A retreat? A placed to take visitors?

We've watched dozens upon dozens of open and closed barges ply the waters. We speculate about what each barge contains. A few are identifiable as carrying oil. A few have carried gravel and coal. Others? We don't know. Makes for interesting conversation. We also passed the notable spot, the Loreley. And several small islands in the middle of the river. The steep hills are covered in vineyards (all sweet white wines like Riesling), and the trees are still turning color here. Makes for lovely scenery.

My DH's project this morning was to compute the speed of the ship by timing the distance between the kilometer markers. He's good at that kind of thing and deduced that today, anyway, we traveled at about 10 km, or 6 miles, per hour.

Currently, we're docked in Rudeshiem (rude-ess-hime) and will stay here until sometime during the night. DH and I decided not to walk into town today. He has a sore spot on his knee (as a double amputee, that's a painful state to be in and prevents much, if any, walking). My foot is quite swollen, I guess from the lengthy walking I did yesterday. Swollen enough that I can hardly get my foot into the larger of the shoes (two) I brought on this trip. A month ago I had to buy new shoes because of swelling from my broken foot. If I wrap my foot then I can't get the foot into a shoe at all. So, I'm resting the foot, consequently. But we're fine. Enjoying the river-side scenery. Each afternoon they serve "afternoon tea." It's not a formal affair, it's just different teas with some cookies or pastries. We haven't attended that yet, so maybe today is the day.

Tuesday, October 30, 2007

Cologne

Location: Cologne (Koln), Germany
Weather: partly cloudy, about 50

Hate this jet lag. Have some trouble keeping my eyes open in the daytime, but then can't sleep a wink at night. Only when I'm so exhausted close to dawn am I able to fall a sleep. DH is sleeping well, darn him! Last night I listened to several podcasts I'd downloaded at home onto my ipod. Music perks me up, but listening to a radio program about high tech innovations puts me to sleep, sort of.

Scenery: pleasant pastoral scenes on both sides of the Rhine. We passed Dusseldorf at 6 am (thankfully I was finally asleep) and docked here at Cologne about 30 minutes ago. It's 1:30 pm. About to leave for a walking tour of Cologne, including the magnificent cathedral. Over the years of European travel I've been through the Cologne train station many times, but never had time to visit the cathedral. It's very striking looking on the city skyline. The tour will also include a beer tasting. And I can visit a chocolate factory if I want to. There are about 125 people on this cruise. Everyone is English speaking (interesting). And the nicest thing, they have both 115 volt plugs in the staterooms, as well as the usual 220 that is standard here. I'm able to charge my laptop and ipod and camera battery without having to use the converter, just using the plug extension.

Maybe later today I'll have some photos to post. It was quite dark and dreary yesterday, and nothing at all worthy of photographing. I'm reading Portrait in Sepia, by Isabel Allende. Interesting story. The ship has a small library, which is good!

Sunday, October 28, 2007

Amsterdam


Temperature: 50
Weather: overcast, no rain
Location: Amsterdam, The Netherlands

We've boarded our ship (small ship) at the harbor in Amsterdam. Above is a photo I just snapped in our cabin. That's DH, Dave, lounging on the ledge. We're docked next to another such small ship, so there isn't much of a view out of the window yet.

Our flights to get here were generally on time, and our luggage, luckily, followed us through London Heathrow (despite British Airways' high incidence of losing luggage when terminal transfers are required, as in our case) and on to Amsterdam. We'd heard some significant horror stories about people having difficulty getting from one terminal to another, even. We didn't have problems. It just took quite a long while. Lots of walking, a 10-minute bus ride, and more and more walking. But, we're here, safe and sound.

We met up with our good friends, Wayne & Lucy, at the hotel, and enjoyed a delicious rijsttafel dinner at a restaurant called Sama Sebo. Having never had this Indonesian "Rice Table" meal, all four of us found the variety of items very generous. Since I understand it'll take a long time to upload photos via the internet connection on the ship (dial-up) I may wait until our return home to load more photos onto the blog.

Jet lag? Well, yes, but let us not put a damper on this blog at this point. Let's just say I think we will sleep well tonight. A half of an Ambien is in order I believe.

Friday, October 26, 2007

Packin' & Flyin'


That's Amsterdam by night.
There has been precious little cooking going on in my kitchen. I've been trying to eat or discard every fresh thing in the refrigerator. We're leaving today on a trip. Our son-in-law will still be here most of the time to watch over the house. Having helped us pack the cars getting ready to evacuate last Sunday, he knows what needs to be saved if, God forbit, there's another fire. Good timing, Todd! Hope it won't be necessary.

We're flying through Heathrow (London) to Amsterdam and will board a Viking river boat that will ply us from Holland to Budapest (down the Rhine then east on the Danube). The boat stops some every day so passengers can explore the villages and small cities en route. We're really looking forward to getting away - from the fires, the smoke, the ashes. The high temp in Amsterdam yesterday was 52°. Big, big change from our mid-80's here in So. California. The river boat has internet, but it's dial-up, so I don't know if I'll get in much blogging. I'm taking my laptop, though, so check back in now and then to see if I've managed to upload at least some pictures.

I made reservations in Amsterdam for a rijsttafel (rice-stoff-ull) dinner. That's an Indonesian rice-based dinner with many dishes. We've been to Amsterdam several times, but never planned ahead to have a rijsttafel dinner. Love this internet - was able to find a place very near our hotel with good reviews. Rijsttafel is kind of like Indian curry with condiments. But different. Hope to tell you all about it. And I'm looking forward to the paprikash in Hungary our last night aboard the boat. Mustn't forget my shopping list, either: buy paprika in many types at the spice market in Budapest before flying home. (photo from gate1travel.com)

Thursday, October 25, 2007

Fire and Smoke


This is kind of what our skies looked like yesterday. We have some ashes (people further south have a lot more) but mostly we have this yellow-orange-filtered light that blankets the skies. The photo above (taken near Cooks Corner in Silverado Canyon, east of our home about 7-8 miles) shows the fires are still raging, just beyond the camera range. Our air is awful to breathe. You step outside and you know there's still a lot of fire in the air.
Our daughter and her family are still evacuated in San Diego, although I read online this morning that they may be allowed back home today. They returned to work yesterday in Escondido, with their 2 children, 1 dog and 2 cats in tow (they own their own business, so they can do that). But the Witch Creek Fire that threatened their home, is still burning and only slightly contained. It's just that it's not close to their home any longer. It's moved on.
Our fire is still raging, 30% contained, and is moving up Silverado Canyon (Modjeska is a side-shoot off Silverado). Many homes have been burned. Yesterday morning everyone was evacuated out of the canyon, and I believe they got most of the horses out. There is a line of foothills (well, one foothill) that separates us from that canyon, but it's heading northwest, and southeast - not our direction. The firefighters have set back fires, so it is hoped they'll get the fire stopped, or at least to change direction. The problem is it's now into the Cleveland National Forest, a huge area of chaparral and scrub brush. But hundreds more firefighters have arrived in So California, so they're trying the best they can. So far, our local fire has burned 23,000 acres. So sad. The fire sleuths are pouring over the 3 set-sites that the arsonist prepared, for clues. They say he was an expert - he knew a lot about fire and how to set one.

Thank goodness for these guys, dropping fire retardant. And thankfully, the Santa Ana winds have dropped to zero. Our humidity is still at about 4%, though. (photos from the Orange County Register)

Wednesday, October 24, 2007

Chocolate Almond Biscotti


Normally I wouldn't bake cookies again for awhile, because I made cookies for Todd, our son-in-law, a few days ago. He likes soft cookies. Although the almond-cranberry cookies I made were nice enough, they don't make my heart sing. They're soft. He, however, loves them. AND, he told me last night that his cookies are all gone already.

I, on the other hand, prefer crisp and crunchy. So when I spied the photo of these Chocolate-Almond Biscotti over at Acme Instant Food, they called out to me. They're low in fat (with only 6 tablespoons of butter in the full recipe) and rich in chocolate and almond flavor. These are really cinchy to make. I kid you not. Just have everything at room temp when you begin, and you'll have these in the oven in about 10 minutes. They do bake for 35 minutes, cool for another 15 (then you slice them carefully), then bake again for another 10 minutes. That's less than an hour.

These get their chocolate flavor from both cocoa powder and chocolate chunks or chips, so they're truly chocolate-y. They also keep well, and would travel well too.
I certainly don't know about the cooking experience level of my loyal readers, but if you've never made biscotti, there are just a couple of things you need to know. You make a dough-type cookie batter. Usually, the stickier the better since you don't want the resulting cookies to be too heavy (read: hard) so you can't even eat them unless you dunk them in coffee or tea. But, making them too wet and sticky is next to impossible to manipulate (roll) into logs. A happy medium is what you're looking for. These were quite easy to mold, although I did have some difficulty with the crumble factor once they did their first baking, as Kevin mentions in the recipe.

Biscotti are drier to begin with - you bake them in logs (pictured above) until they're more than "cooked," then you allow them to cool some so you can handle the logs. Then you cut them into longer sticks. They must be thick enough to hold together, but this is always the tricky step for me.

One great helpful hint from Keven, though, that I'd never tried before, was to use a serrated knife only to cut through the crust, then use a flat bladed knife to finish the "cut." That worked like a charm. Then you bake them a bit longer to completely dry them out. Cool, package and store in plastic bags for a few days (or a tin) or freeze. These cookies have a very nice deep chocolate flavor. Satisfies my chocolate cravings and my desire for crispy/crunch cookies.

Chocolate Almond Biscotti
Recipe: Acme Instant Food (blog), adapted from epicurious.com
Servings: 28
2 cups all-purpose flour
1/2 cup unsweetened cocoa powder
1 tsp baking soda
1 tsp salt
1/2 teaspoon ground cinnamon
6 tablespoons unsalted butter
1 cup sugar
2 large eggs -- room temperature
1 cup almonds -- unsalted, sliced
3/4 cups semisweet chocolate -- chopped
1. Preheat oven to 350F. Line a baking sheet with parchment paper (or butter and flour).
2. Whisk flour, cocoa powder, baking soda, cinnamon and salt together in a bowl.
3. Using electric mixer, beat butter and sugar until creamed and very fluffy. Add eggs one at a time, beating until well combined. Slowly stir in flour mixture to form a stiff dough. Stir in almonds and chopped chocolate. Divide dough in half. Form each half into a log about 2 inches wide and lay on prepared sheet. Remold if necessary on sheet and flatten the logs slightly. Bake for 35 minutes or until outside feels firm.
4. Remove sheet from oven but leave oven on. Let logs cool on sheet for 15 minutes. Transfer biscotti to a cutting board.
5. Using serrated knife, gently slice logs diagonally into roughly 1/2 inch slices. If crumbling is a problematic, use serrated knife to "saw" just through outer crust and then use a very sharp (non-serrated) knife to slice through--using a motion straight from the top down. Arrange cut biscotti on their side on baking sheet and return to oven for an additional 10 minutes, or until crisp. Once cool, you may optionally dip half of each biscotti into melted dark or white chocolate.
Per Serving: 142 Calories; 7g Fat (42.5% calories from fat); 3g Protein; 19g Carbohydrate; 1g Dietary Fiber; 22mg Cholesterol; 128mg Sodium. Exchanges: 1/2 Grain(Starch); 0 Lean Meat; 1 1/2 Fat; 1/2 Other Carbohydrates.
To view a PDF recipe, click title at top.

Tuesday, October 23, 2007

Update on our fire(s)


This is the same fire that was about 3/4 of a mile from our home on Sunday. It's called the Santiago Fire, but our newscasters are now calling it the Modjeska Fire, since the wind shifted this morning and the fire has begun moving north into Modjeska Canyon, a very rural area directly east of our home by about 4-5 miles. It's a 10+ mile long canyon and so far it's burning at the further (southeasterly) end. It's mostly vegetation with some small and large homes spotted throughout, but because of the steep terrain there and the heat of the fire, the firefighters have mostly pulled out and are having to let it burn. Hundreds of homes will be lost. And likely thousands of domestic animals. It's a haven for horses.
The homes you see in the photo are a new group of subdivisions called Foothill Ranch. That's not the Canyon - it goes off to the right. All the homes in Foothill Ranch have been evacuated.
Our daughter in San Diego (and her family) were evacuated yesterday very early morning. So far their home is okay, but they can't return yet. San Diego has the worst of the fires, I think. Over 1400 homes have burned to date, and the fire is completely out of control. Southern California is known for its hills and small valleys and gullies. Usually homes aren't built in the gullies, so if a fire gets started, the wind can carry the embers from one gully and valley to another in nothing flat.

This is an enhanced satellite view of Southern California, showing the fires. The top one is Canyon Country, about 40 some miles north of Los Angeles. The one dot at the ocean is Malibu. The group inland from Malibu is Lake Arrowhead. Below that is our Santiago/Modjeska fire. The one below that is at Camp Pendleton in very north San Diego County. The bottom two groups are in the San Diego area. They're by far the biggest fires and the most dangerous to human life. Our TV is saying there are still 10 major fires burning in So. California. You can see how the winds carry the smoke out to sea, but the fires also spread that way. The Santa Ana winds, that were gusting from 40-60 mph have reduced to probably less than 10 now, so that's good. Fires won't spread as rapidly, but the dry brush gives them lots of fuel to burn.

(photos from the Orange County Register.)

Butternut Cube Fries


One of the things that deters me from buying whole butternut squash is the difficulty of cutting it (first), the yukkiness of scooping out and discarding the seeds and strings (second), scraping that stringy stuff away from the inner hollow (third) and lastly, the slicing or dicing of the hard squash itself (fourth). So when I spotted fresh pre-cut butternut squash at Costco last week, I bought two 2-pound bags. Some of it went into a soup I made last week, and the balance was made into butternut fries.

Normally, "fries" ought to be long wedges, but I had cubes. That didn't deter me one bit. I snooped around the internet a little bit and found a few recipes (I just did a google search for butternut squash fries). I kind of used my own imagination. Rachael Ray's online magazine had a recipe that used maple syrup and creme fraiche, plus lime juice plus some seasonings. I took ideas from the few recipes I did find, and here's what I did: I tossed the cubes with olive oil, and sprinkled them all over with a mixture of ground cumin, garlic salt and some mild chile powder (I used Chimayo). The squash went into a relatively hot oven (425) and baked for about 45-60 minutes. I thought they'd be done in about 40, so tasted it. Disappointment at that point. I'm SO glad I left them to bake another 10-15 minutes because they became succulent, a bit crispy on the outside edges, and those said edges had begun to caramelize with their own natural sugars. In that short time they became magic. Amazing how baking chemistry works. These are remarkably easy. If you prefer more sweetness to them, by all means sprinkle them with some brown sugar, or try maple syrup. But it's not needed, I assure you.

Butternut Squash Fries
3 pounds butternut squash, cubed
2 tablespoons olive oil
2 tablespoons ground cumin
1 tablespoon mild chile powder
1/4 teaspoon garlic powder
Olive oil spray to coat pan
1. Preheat oven to 425. Prepare a large sheet pan and coat with olive oil spray or cooking spray.
2. Pile the squash cubes on the tray. Combine the dry ingredients and mix with a spoon, then sprinkle it all over the squash. Using your hands, mix the squash so every cube has some herbs and is slick with olive oil. (You may want to add more olive oil than I did.) Add salt and pepper to taste.
3. Bake for 45-55 minutes, testing the squash, removing it when the edges have begun to brown and crisp and the squash has begun to caramelize. You'll notice a sweet taste to it, even though there is no sugar in the recipe. Serve while they're hot, and add more salt just before eating.
Per Serving (excluding unknown items): 103 Calories; 4g Fat (31.3% calories from fat); 2g Protein; 18g Carbohydrate; 3g Dietary Fiber; 0mg Cholesterol; 18mg Sodium. Exchanges: 1 Grain(Starch); 0 Lean Meat; 1 Fat.
To view a PDF recipe only, click title at top.

Monday, October 22, 2007

Arson


(A corner of our jacuzzi, filled with leaves, twigs and soil. Our pool guy, Bill, will have a very busy week ahead of him.)
I'm wondering if catching the arsonist who set this fire closest to us and hanging him is cruel enough. Someone else suggested a public hanging. That's still not enough. Torture would be good. I don't understand the mentality of arson. This person set the fire in three places. One wasn't enough. He had to set three, to make sure, I suppose. Sigh. I think I've read that arsonists are often successful at eluding arrest. This guy chose a good time, right at dusk last night, when his escape would be mostly hidden.

We're lucky. Very lucky that no homes, so far, have been lost in our closest fire. But Malibu is another story. The winds, these hot gusty Santa Ana winds that blow in from the desert and plague our part of the world in the winter (mostly), love to whip up and down through gulleys and valleys. Malibu is particularly hard hit by the gusty winds, stronger there, always, than they are where we live. Many, many homes are nothing but ash. People live in Malibu, up in those canyons because they can be private, anonymous, behind gates, away from paparazzi, neighbors. But, those same assets become huge liabilities when the wind blows. Mother Nature can wreak havoc so quickly. But we love our mild seasons here. We suffer earthquakes and winds and fires, so we can live in this part of God's paradise.
Another fire has started in Lake Arrowhead. For any of you who don't know it, Arrowhead and Big Bear are resorts in the mid-high mountains close by. They're beautiful villages with lots of mountainous pine and cedar trees. The air is clean, clear, and the climate ideal for skiing in the winter and cooler in the summer than it is down at sea level. Watching tv newscasts of the thousands of acres of beautiful pine trees burning in a big whoosh just makes me cry. I pray for all the people and animals who have lost their homes or habitat because of these fires. I pray that God will see fit to send us rain. Soon.

Leftovers Soup


Depending on your leftovers, here was my solution last night, before we knew what our night would be like:
  • Open refrigerator and scope out everything that is still usable (dispose of slimy, moldy, smelly and questionable items)
  • Line everything up and do an overview of the situation
  • In my case, this meant look, smell and taste the following: chicken and onions topping from the pizza last week, the twice-baked cauliflower take 2 from a couple of nights ago, the raw carrots languishing in the produce drawer, the lemon crusted chicken from another dinner and the butternut fries.
  • To the pot add a quart of boxed chicken broth, and add raw carrots. Cook for awhile, then add any cooked vegetables and a few cups of water. Use an immersion blender once the soup has reached simmering.
  • Add 1 cup or so of milk, taste for seasonings, add the meat (chicken) and heat through. Scoop into bowls and serve.

The next order of business was to turn on the television and watch approaching wildfires in our area of Southern California. At about 6:30 pm last night my DH spotted a huge, black smoke cloud as it spread east and south of us. He'd been watching football games, so we switched to news, only to find the only fire they were reporting was the very serious one in Malibu (which is still raging out of control as of this morning). It was at least an hour or more before they began reporting our fire, by then raging out of control, virtually no firefighters on tap because they were mostly sent to Malibu.

We've known that our area is a potential tinderbox after the very dry spring. Throw in a relatively hot summer, and only one day of showers a week or so ago, and you have a potential for disaster.

After dinner, we lost power. Quick hunt for candles and candle lighters. Knowing the fire was within about a mile of our home, we began packing up our most precious belongings (using flashlights), evacuated our station wagon full of valuables, mostly paintings and artwork. We took turns driving to a ridge near us (along with dozens of other lookie-lous) to watch the fires as they whipped more our direction from the further ridge. Scary. Very, very scary. Our firefighters are taxed beyond comprehension with fires that are blazing all over Southern California. As I write this, there are 10 fires, major fires, here and the winds have already picked up now that it's dawn. Today we're expected to have continued very high winds and temperatures in the high 90's. Bless the firefighters for holding the fire line beyond our homes.

Spent a very wearying night, listening to these Santa Ana winds just whip around our home, toppling potted plants and trees, leaves everywhere, the pool a mess of dirt and leaves. We lost power for about 11 hours, so only had battery operated radios. Power was restored at about 5:45 this morning, so we now have TV reception again. It's going to be a long day. The fire is far from contained (5% contained at 6 am this morning), but at least it's not burning our direction. Thank you, Lord, for sparing our home.


Sunday, October 21, 2007

Twice Baked Cauliflower Take 2


Improvise. That's the word of the day. I had a head of cauliflower and hadn't decided what I'd do with it. Remembering how wonderful the twice-baked cauliflower is that I posted a few months ago, I looked at the list of ingredients and didn't have everything. When I made it months ago I'd adapted it from the recipe over at Kalyn's Kitchen. This time I had about 1/3 cup of sour cream, but no Parmesan. I had about 2 ounces of cream cheese, but no green onions. So, I improvized. The mother of invention, so they say.

This is the dish that is kind of like mashed potatoes, but it's made with cauliflower. You mash it up, kind of like you would with mashed potatoes, but it's not as smooth. Then you add in the fixins, like bacon, sour cream, etc. What I did have was: bacon, a tad of cream cheese, a bit of butter, and buttermilk (I often add buttermilk to my mashed potatoes, so my thinking went along that this would be a good addition to cauliflower too). So, here's an adjunct recipe for twice-baked cauliflower. You can use whatever cheese you have - I happened to have a nutty, but mild white cheese with truffles in it. I hadn't planned on cooking with this cheese, but it was beginning to grow some mold on the outside, so figured I'd best use it pronto. It was delicious. We had seconds it was so good.

Twice-Baked Cauliflower Take 2
1 whole cauliflower, cut into large florets
3 slices bacon, thick-cut, minced
4 ounces cheese, your choice, shredded, divided use
1/3 cup sour cream
2 ounces cream cheese
3 tablespoons buttermilk
1. Bring a large pot of water to a boil and add the cauliflower. Cook until the cauliflower is just tender when you poke the stem with a knife. Drain and set aside.
2. Meanwhile, fry the bacon until brown. Drain on paper towels and set aside.
3. Mash the cauliflower until it's relatively smooth, but will still have small pieces visible. Save some cheese to put on the top. Add all the other ingredients and stir until combined. Pour into a small casserole dish and top with remaining cheese. (This can be eaten at this point, but it's best if you bake it for just a few minutes, or pop it in the microwave to heat it up completely.)
Per Serving (excluding unknown items): 515 Calories; 46g Fat (78.5% calories from fat); 16g Protein; 12g Carbohydrate; 3g Dietary Fiber; 114mg Cholesterol; 590mg Sodium. Exchanges: 1 1/2 Lean Meat; 1 Vegetable; 1/2 Non-Fat Milk; 8 Fat.
To view a PDF recipe, click title at top.

Saturday, October 20, 2007

Crusted Chicken with Lemon & Garlic


When a cooking instructor says something like "this is one of my favorite recipes," I listen up. Make notes. And prepare the dish soon for my family. That's this recipe today. Phillis Carey, whom I've mentioned many times before, is a wizard with chicken (she's even published a cookbook about chicken). I've made any number of the recipes in her cookbook, and this is a relatively easy one. Dinner, with a fresh vegetable and salad, took an hour. (Sorry Rachel, I can't seem to manage 30 minute meals no matter how I try, unless I'm reheating leftovers.)

What sets this recipe apart from lots of other baked chicken breasts are the following things:

  • the lemon zest and lemon juice
  • the fresh bread crumb topping
  • the extremely hot oven it's baked in

Lemons are a regular on my menus, all times of the year. We found a stray Meyer lemon on one of our dwarf trees a week or so ago, which made me very happy. I used part of it the other day and had a half leftover. Just barely enough to add juice to the sour cream mix and zest to add to the bread crumbs. I can't say that it was very easy zesting a cut/half lemon, but I managed.

The bread crumbs must be fresh. Do not, under any circumstances, use canned bread crumbs for this. They'll make it way too dry. You need crumbs that have some moisture. I do keep some crumbs in the freezer, but I must say they don't keep overly well once the icy particles cling to them. I've even used wheat bread for this, although I do think white bread makes a prettier crust.

First you pound the chicken breasts to make them approximately uniform in thickness. Prepare the sour cream mixture and have the bread crumbs at the ready. I use a large silpat in a pan.


I remove the chicken tenders and make them separate, small servings. Try to mush them up thicker, so they don't overbake. Then you cover the chicken with the sour cream, garlic, lemon juice and mustard mixture. That takes about 2 minutes max. Then you sprinkle the fresh bread crumbs on top and kind of pat it onto the sour cream so it sticks. Cover as much of the sour cream as you can.
Meanwhile you will have heated the oven to 475 (hot!). Pop these babies in that hot oven and watch them carefully so they don't dry out. Mine take exactly 12 minutes. Serve immediately.

Chicken with Garlicky Lemon Crust
Recipe: Phillis Carey, cooking instructor and author
Serving Size : 6
6 pieces chicken breast half without skin salt and pepper -- to taste
3 whole garlic cloves -- minced
1/3 cup Parmesan cheese -- freshly grated
1 cup sour cream
2 tablespoons lemon juice
1 tablespoon Dijon mustard
3 cups fresh bread crumbs
2 teaspoons lemon zest
1. Preheat oven to 450° - on convection bake, if available. Line a baking pan with parchment or with a Silpat. Trim chicken and pound it to an even 1/2 inch thickness. Lay chicken shiny side up on the baking sheet and season with salt and pepper.
2. In a small bowl combine the garlic, Parmesan, sour cream, lemon juice and mustard. Spread this mixture over the top of the chicken breasts, covering completely. You can chill the chicken at this point if necessary. Combine breadcrumbs and lemon zest and press them lightly to mold them on top of the breasts. Cup your hand gently to press them into place.
3. Bake 12-15 minutes or until chicken is cooked through and bread crumbs are well browned.
NOTES : If you don't have sour cream, use yogurt or mayonnaise instead. The breadcrumbs make this dish - it's absolutely necessary to use fresh crumbs, not canned, dried ones. You can whiz up some sliced white bread in the processor. The instructor said this was one of her favorite recipes.
Per Serving: 298 Calories; 12g Fat (36.3% calories from fat); 32g Protein; 14g Carbohydrate; 1g Dietary Fiber; 89mg Cholesterol; 333mg Sodium. Exchanges: 1/2 Grain(Starch); 4 Lean Meat; 0 Vegetable; 0 Fruit; 0 Non-Fat Milk; 2 Fat; 0 Other Carbohydrates.
To view a PDF recipe, click title at top.

Friday, October 19, 2007

Almond-Cranberry Cookies


Well, the Heavenly Cream Cheese Brownies disappeared in a flash around here, what with DH's Bible Study Group yesterday and our son-in-law having a snack now and then. So, back to the drawing boards to make some more cookies.

I'd earmarked this recipe for Almond-Cranberry Cookies nearly a year ago, from the blog The Wednesday Chef. She'd taken a Regina Schrambling recipe and made it her own (pistachios to almonds). Regina Schrambling is a food writer for the New York Times. And if you haven't ever read The Wednesday Chef, it's a blog about food recipes from both the N.Y. Times and the Los Angeles Times (both papers having had a long-time rivalry, everything from editorial to recipes).

Written by Luisa Weiss, The Wednesday Chef is somewhat of a face-off between the food sections of both papers. Luisa chooses recipes from both papers and prepares them with commentary. I thoroughly enjoy reading Luisa's blog and have done so for about 18 months. She does like Regina Schrambling, and features her recipes with some regularity. She also likes Russ Parsons, from the L.A. Times.

Cranberries in cookies are a favorite for me. The dried kind that go into everything from trail mix to salads to cookies. The recipe is very easy. I did use my Kitchen Aid mixer, but Luisa's recipe just mixes it up in a bowl with a wooden spoon. Very easy. The cookies have a crisp bottom, but they're tender and soft everywhere else. They're made with all brown sugar, which gives them a caramel-y taste too. Delish.

Todd, our son-in-law, who said he'd sure like to have a cookie now and then (hint, hint, he was implying) while he's staying with us, likes SOFT cookies. If you read my posting about 3 weeks ago about chocolate-chocolate chip cookies, you will know that I like crisp cookies. But I'm making these for him. Todd, they're in the plastic bag in the freezer door, bottom shelf.

Almond-Cranberry Cookies
Recipe: From The Wednesday Chef (blog)
Servings: 36
1 3/4 cups flour
1 teaspoon baking powder
3/4 teaspoon baking soda
1/2 teaspoon kosher salt
3/4 cup unsalted butter -- (1 1/2 sticks) softened
1 1/4 cups packed light brown sugar
1 large egg
1 teaspoon almond extract
1 cup blanched almonds -- toasted and coarsely chopped
1/2 cup dried cranberries
1. Stir together the flour, baking powder, baking soda and salt and set aside.
2. Cream the butter and brown sugar together with a wooden spoon until smooth. Blend in the egg, almond extract and vanilla. Gradually blend in the dry ingredients until well mixed. Stir in the nuts and cranberries.
3. Drop the dough by tablespoons onto ungreased baking sheets, leaving about 2 inches between each. Bake the cookies in a 375-degree oven until light golden brown (centers should be soft), about 10 minutes. Remove from oven and let stand 2 minutes, then transfer to a rack to cool completely.
Per Serving (excluding unknown items): 111 Calories; 6g Fat (48.7% calories from fat); 2g Protein; 13g Carbohydrate; trace Dietary Fiber; 16mg Cholesterol; 72mg Sodium. Exchanges: 1/2 Grain(Starch); 0 Lean Meat; 0 Fruit; 1 Fat; 1/2 Other Carbohydrates.
To view a PDF recipe, click title at top.

Wednesday, October 17, 2007

Heavenly Cream Cheese Brownies


It all started when I was sifting through my file for cookies to bake. Our son-in-law, Todd, asked about the chocolate-chocolate chip cookies I blogged about 2 weeks ago. I don't suppose Todd reads my blog normally. But my laptop that lives here in the kitchen is the one he uses in the evenings to catch up on his email. My blog was up, front and center last night, so he started glancing through it, spying things he's eaten in the last couple of weeks. He spotted the picture of the cookies. There's just one measly cookie left in the freezer, I was sad to tell him.
So I wanted to make something for him to snack on while he's here. Nothing jumped out at me amongst my stand-bys, so I went to my file. The 100+ clippings I have from over 40 years of saving recipes. I used to be in an annual Christmas cookie exchange, so I have all those recipes. And little slips of paper from friends and acquaintances. Plus the bulk of magazine and newspaper clips, and a few taken from the internet. I had so many that some years ago I had to divide them up by cookie type (chocolate, bars, brownie type, holiday, spice, candy-type, etc.).

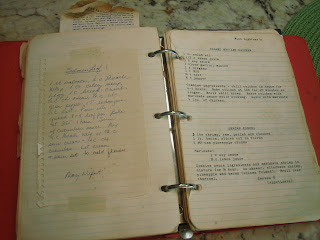
(this is my old recipe notebook circa 1965)
But, in looking through the very large stacks, I spied a photo of a cream cheese brownie which brought back a flood of memories. I went to my old binder where I used to hand-write all my favorite recipes. Went right to the page where I had my recipe for "Heavenly Cream Cheese Brownies." The recipe is not there. The yellowed scotch tape is still there, but the recipe, a magazine clipping, is missing.

I knew the name was exactly "Heavenly Cream Cheese Brownies. Figuring I'd find hundreds of listings on the internet, I put in exactly that phrase into my google search box. Nothing. Huh? How can that be? There's a site that tries to recreate or house archives of "lost" recipes. It's called
astray. I was certain it would be there. No, not by that name. After spending far too much time looking at various "cream cheese brownie" recipes I went to my cookbooks and figured some of those home-spun cookbooks I have would list this. Nada.

I don't remember what type of chocolate the recipe used, but it seems to me that it was German's sweet chocolate. The method: you poured some of the brownie mixture in the bottom of an 8x8 pan, then poured on the cream cheese batter that had a tad of flour in it (there wasn't enough to cover the chocolate layer), then you blobbed on the last of the chocolate batter, which also didn't cover completely. Then you ran a knife through it to swirl it around. Bake, slice and eat. I always loved that recipe.

I dug out my box of chocolate ingredients. Actually I have more than one, but this one contains the myriad of bar chocolates I use for baking. Thankfully, there was a bar of German's sweet chocolate amidst this pile. I do eat chocolate too. But I diligently limit myself to about 1 ounce when I do. My preference for eating is the low-effective carb bars from Trader Joe's. The dark chocolate type. I wanted to stock up on them (to take on our upcoming trip), but TJ's is currently out of them. Hope that's not permanent.

My guess is that the cream cheese brownies recipe was first published (in a magazine ad) in the 1970's. My recollection is that it was an ad for Knudsen Philadelphia style cream cheese. I remember reading it and thinking, what a novel idea. I tried it right away, and was very pleased with it. Over the years I probably made it more than 20 times. Now, of course, that I don't have the original recipe, I was feeling bereft.

I finally found a recipe on
allrecipes for a cream cheese brownie. It does use the German's chocolate, and looks much like the one I remember. And the directions seem to ring a bell. Many of the recipes I found used a brownie mix. I didn't want to do that, since I was sure the chocolate wasn't cocoa, or Hershey's liquid. So I wanted the real thing. So this one, submitted by a gal named Rosina, fit the bill. I also found a couple of recipes on the astray website that called them German's sweet chocolate cream cheese brownies. They're identical to this one, so I think I found the recipe. I'll hope so. Here's the batter all ready for the oven. I did use about 7 ounces of cream cheese. The original recipe calls for just a 3-ounce package. So mine have more of that light cheese swirl.

The report: excellent. They were exactly what I remembered. Bereft no longer, am I.

Cream Cheese Brownies
Recipe: allrecipes.com
Serving Size : 16
4 ounces chocolate -- German sweet bar
5 tablespoons butter
8 ounces cream cheese -- softened
1/4 cup sugar
3 whole eggs
1 tablespoon all-purpose flour
1/2 teaspoon vanilla
3/4 cup sugar
1/2 teaspoon baking powder
1/4 teaspoon salt
1/2 cup all-purpose flour
1/2 cup chopped pecans
1 teaspoon vanilla extract
1. Melt chocolate with 3 tablespoons of the butter over very low heat. Stir constantly until smooth. Set aside to cool.
2. Cream remaining 2 tablespoons butter with cream cheese until smooth. Gradually add 1/4 cup sugar. Cream until light and fluffy. Blend into this 1 of the eggs, 1 tablespoon flour and 1/2 teaspoon vanilla. Set aside.
3. Now beat the remaining 2 eggs until light and fluffy. Gradually beat into them 3/4 cup sugar. Continue beating until thickened. Stir in the baking powder, salt and 1/2 cup flour. Add to this the cooled chocolate mixture. Blend well. Stir in the nuts and 1 teaspoon vanilla.
4. Spread half of the chocolate batter into an 8x8 inch greased baking pan. Spread the cream cheese mixture over the top. Then drop the remaining chocolate batter by tablespoons over the top of the cream cheese mixture. Swirl through batter layers with a spatula for a marbled effect.
5. Bake in a preheated 350 degrees F (175 degrees C) oven for 35 to 40 minutes. Cool in the pan. Cut into squares or bars.
Per Serving (excluding unknown items): 221 Calories; 14g Fat (56.9% calories from fat); 3g Protein; 21g Carbohydrate; 1g Dietary Fiber; 65mg Cholesterol; 142mg Sodium. Exchanges: 1/2 Grain(Starch); 1/2 Lean Meat; 2 1/2 Fat; 1 Other Carbohydrates.
To view a PDF recipe, click title at top.

Tuesday, October 16, 2007

Leek, Kielbasa & Sausage Soup


Soup season lasts about 8 months around our house. I've even been known to make soup in the heat of the summer, although not very often. So now that the weather has really turned cooler (we've even had some rain) I was anxious to make some soup this week. My recipe started out with a small package of Italian sausage (bulk grind type) that I found in the freezer, and I just built the recipe from there. I looked on Epicurious and found a leek and sausage soup to start from, then I embellished it with other things from the pantry and the refrigerator. Having made a trip to Costco yesterday, I had a package of pre-cut butternut squash. Some of that went in the soup too as well as a package of fresh chanterelle mushrooms. Once put it front of us, we all just tucked into it with relish. Delicious.

There was only one thing I did differently here, that I've never done before: once I chopped up the Kielbasa, I browned the cubes in a hot frying pan with a little olive oil. The sausage rendered out some of its fat, a good thing, and it got browned edges all over them, so not only did the soup have the smoky flavor of the sausage, but the chunks were crispy. I did not cook the Kielbasa in the soup very long. Whenever I do that, it seems like all the flavor is leeched out of the sausage and it doesn't taste like much. This way, the sausage is still full of flavor. If you like the smoky taste to penetrate all through the soup, add part of the sausage to the soup while it cooks, then add the browned cubes at the last.

Leek, Kielbasa and Sausage Chowder
Recipe: A Carolyn T, Tasting Spoons original
Servings: 10
3 tablespoons butter
2 tablespoons olive oil
8 whole leeks -- trimmed and sliced
4 whole shallots -- minced
4 whole carrots -- chopped
4 stalks celery -- chopped
8 cups chicken broth
10 ounces chanterelle mushroom -- chopped, or regular white mushrooms
1 pound Kielbasa -- cut into 1/2 inch cubes
1/2 pound Italian sausage
1 tablespoon Italian herbs -- or mixture of thyme, rosemary, oregano
1/2 teaspoon ground pepper
2 cups butternut squash -- cubed (optional)
2 cups potatoes -- peeled, cubed
1 cup milk
3 tablespoons flour
1/2 cup whipping cream
1. Prepare all the vegetables. Heat a large, heavy soup pot, add olive oil and butter, then add leeks, celery and shallots. After 5 minutes add the carrots.
2. When the leeks have partially caramelized (browned), add the Italian sausage and continue to cook about 5 minutes. Then add mushrooms and chicken broth. Bring to a boil and reduce to a simmer.
3. Meanwhile, cut up the potatoes and squash and set aside. Add them to the soup pot with the herbs.
4. When the potatoes and squash are nearly cooked, heat up a second flat skillet, add a bit of olive oil, then fry the Kielbasa until the edges are starting to brown all over. Drain fat and add to the soup pot.
5. In a jar combine the milk and flour and shake until no lumps appear. Add to the soup pot and continue to cook for about 5-10 minutes. Add the whipping cream, heat briefly, taste for seasonings. Add ground black pepper. Add salt if desired, but it probably isn't necessary.
Per Serving (excluding unknown items): 548 Calories; 32g Fat (51.7% calories from fat); 20g Protein; 49g Carbohydrate; 7g Dietary Fiber; 77mg Cholesterol; 1362mg Sodium. Exchanges: 1/2 Grain(Starch); 1 1/2 Lean Meat; 7 Vegetable; 0 Non-Fat Milk; 5 Fat.
To view a PDF recipe, click title at top.

Monday, October 15, 2007

Italian Grilled Mozzarella Skewers with Pesto


I went to a cooking class a few weeks ago. The subject was tapas, which is always fun. These, however, were all grilled tapas; perfect for the end of summer. The instructor, Tarla Fallgatter, had just returned from a trip to Japan, so she decided to create one Asian style tapas, which she said she ate in several places there. I guess the tapas idea is spreading 'round the world. Somehow, Asian style small plates just doesn't quite fit in my definition of tapas. I didn't care for her version of yakitori chicken skewers. Or the grilled potatoes either. But these Italian skewers were very nice. Different. Kind of fun. Fairly easy.

Serving this as a sit-down appetizer (first course) might be better than trying to eat it out of hand. The skewer required a bit of manipulation to get the food off of it and onto the plate. There was a bed of halved cherry tomatoes, tossed with a little dressing (not included in the recipe) and mixed with a bit of pesto too. The skewers are lightly toasted bread cubes, fresh basil leaves, bocconcini (small mozzarella balls, fresh only), drizzled with a bit of olive oil, grilled briefly and placed atop the tomato salad. A very refreshing grilled starter.

Here are the skewers prior to grilling.

Grilled Mozzie Skewers with Pesto
Recipe By: Tarla Fallgatter class
Serving Size : 6
1 whole Italian bread loaf
Olive oil for bread
8 ounces mozzarella cheese -- fresh bocconcini (small balls)
24 whole basil leaves
1 pint mini plum tomatoes -- halved
4 tablespoons pesto sauce
12 wooden skewers, soaked in water 30 minutes
1. Preheat outdoor grill. Slice bread into 1 1/2" cubes. Coat the cubes with olive oil and set aside. Or, if the bread is fresh, put it in a 350 oven for 2-4 minutes until just barely toasted on the outside. Do not dry them out as you want the bread to be soft in the middle after you've grilled the skewers.
2. Meanwhile, cut up tomatoes, season with salt and pepper and drizzle them with a little olive oil and some pesto. Toss to coat.
2. Thread 2 bocconcini alternately with bread (3 bread, 2 cheese) and basil. Sprinkle with salt and pepper and place on the grill. Cover and cook for 3-6 minutes, turning halfway through to toast both sides of the bread and warm the cheese. Remove skewers from the grill. Put a portion of the tomatoes on each plate and lay the skewer on top. Drizzle additional pesto on top of the bread and cheese. Serve while they're hot.
Per Serving (excluding unknown items): 193 Calories; 14g Fat (65.6% calories from fat); 11g Protein; 6g Carbohydrate; 1g Dietary Fiber; 37mg Cholesterol; 251mg Sodium. Exchanges: 0 Grain(Starch); 1 1/2 Lean Meat; 1/2 Vegetable; 2 Fat; 0 Other Carbohydrates.
To view a printable recipe, click on title at top.

Sunday, October 14, 2007

Pizza with Chicken, Red Onion, Pesto & Olives


How many possible pizza combinations are there, out there? Way too many for me to guesstimate. When California Pizza Kitchen opened up, probably 20 years ago, I was amazed at the variety. It surely swept in with the "California" style of cooking. Lightening up, fresh ingredients, etc. Lots of chicken.

So, when our daughter, Sara, was still living at home with us (probably she was in college then), she had a hankering for pizza one evening, and looked through a cookbook I had. She settled on this one, using a whole wheat dough that was easily mixed up in the bread machine. By the time DH and I got home from work, she was in the middle of this and we all just raved about how good it was. I've made this umpteen times since then, always to good reviews. I don't make pizza often. In fact I don't think we've even eaten pizza in over a year, but it just sounded good.

Our son-in-law, Todd, is still staying with us (he's an electrician, and is wiring the new house for our son and his wife), and he's a pizza fan, so I thought this would be a good choice.

First you make the whole wheat bread dough in your bread machine. You don't have to use whole wheat dough. We just liked it that way from the get-go. It's a mixture of 2/3 white and 1/3 wheat flours. It still has the resiliency and easy rising ability of white, though. The joy of the bread machine is that it makes pizza dough so very easy. You use the machine for mixing the dough and rising it once. Then you remove it and continue by hand. Sara used the recipe from my bread machine's book and we've stuck with it ever since. I used Trader Joe's pre-made pizza dough: I bought one white and one whole wheat and mixed them together.

Meanwhile, you marinate the chicken pieces in some lemon juice, olive oil and oregano. But, having made this plenty of times, if you forget this step, just briefly saute the chicken pieces IN the lemon juice marinade, then you'll get at least some of the wonderful lemony flavor. Thank you, Sara, for finding this gem of a recipe.

Pizza with Grilled Chicken, Red Onion, Black Olives & Pesto Recipe: From "Pizza, California Style" by Norman Kolpas.
Servings: 4
1/4 cup olive oil
2 tablespoons lemon juice
1 tablespoon oregano
1/2 pound boned and skinned chicken breast halves -- trimmed, cut in half
3/4 cup pesto sauce
1/3 cup grated Parmesan cheese -- or Feta
24 whole black olives -- Mediterranean pitted
1/2 pound mozzarella cheese -- shredded
1 medium red onion -- thinly sliced
24 ounces pizza dough
1. In a small plastic bag combine the olive oil, lemon juice and oregano, add chicken and turn to coat evenly. Seal and refrigerate for several hours, or leave at room temperature if it's only for 30-60 minutes. Turn the bag several times.
2. Preheat the oven (and pizza brick, baking tiles or baking sheet) to 550°. Sprinkle the chicken breasts with salt and pepper and grill or broil about 1 minute per side, until they are seared but not cooked through. With a sharp knife, slice the chicken into 1/4 inch thick pieces. Place a ball of dough on your work surface that's been sprinkled with semolina. Press down with heels of your hands and flatten the dough. Lift and gently pull the dough to stretch it into a circle about 8 inches in diameter. Press a slight rim around the outside edge. Repeat with remaining dough. Spread 1/4 cup of the pesto on each pizza, right up to the rim. Using about a third of the mozzarella, sprinkle that on the pizza, then add chicken pieces and red onion slices. Top with additional mozzarella, then sprinkle the Parmesan (or Feta) over each and dot with black olive halves.
3. If possible, slide a pizza paddle under the dough and transfer to the hot oven and slide onto the pizza bricks. Bake for 8-10 minutes in a traditional oven, or 6-8 minutes in a convection oven or until the dough is browned and crisp and the cheese is golden and bubbly. Remove from oven and allow to sit just a minute or so before cutting into wedges with a big knife or pizza cutter.
NOTES : This recipe uses a whole wheat crust that I make in the bread machine. It uses the standard bread machine pizza dough recipe that calls for about 3 cups of flour. It yields 1& 1 /2 lbs of dough, which can be divided into 4 individual pizzas, or divided in half to make two mid-sized pizzas. When I'm in a hurry I just pour the chicken and the marinade into a nonstick pan and cook gently until about half done, then proceed with slicing, etc. And I think I prefer the Feta cheese to the Parmesan.
Per Serving (excluding unknown items): 1044 Calories; 59g Fat (50.4% calories from fat); 47g Protein; 83g Carbohydrate; 4g Dietary Fiber; 102mg Cholesterol; 943mg Sodium. Exchanges: 5 Grain(Starch); 5 Lean Meat; 1/2 Vegetable; 0 Fruit; 9 1/2 Fat; 0 Other Carbohydrates.
To view a PDF recipe, click title at top.

Whole Wheat Pizza Crust

This is the tried and true recipe I've used for years in my bread machine. I'm posting it here to accompany the above pizza recipe itself. Look at your own bread machine cookbook to verify amounts of yeast and water. They may vary according to the manufacturer's directions. In my machine it takes about 55 minutes to mix, knead and rise once.

Whole Wheat Pizza Crust
Recipe: from "Pizza, California Style"
Servings: 4
2 cups all-purpose flour
1 cup whole wheat flour
1 teaspoon salt
2 teaspoons honey
2 tablespoons canola oil
1 1/2 cups water
1 tablespoon yeast In bread machine: place all dry ingredients in pan, then add water last. Set for dough. Watch during the initial kneading to make sure the dough has the right consistency - too wet or too dry.
Per Serving (excluding unknown items): 409 Calories; 8g Fat (17.6% calories from fat); 12g Protein; 74g Carbohydrate; 6g Dietary Fiber; 0mg Cholesterol; 540mg Sodium. Exchanges: 4 1/2 Grain(Starch); 0 Lean Meat; 1 1/2 Fat; 0 Other Carbohydrates.
To print a PDF recipe, click title at top.

Saturday, October 13, 2007

Company Cabbage & a little bit about Paprika


Until 15 years or so ago I didn't know much of anything about paprika, really, except that I had a can of it on my shelf. Then I read somewhere about how paprika gets bugs if the can is left on your spice shelf. I opened my can, and oh my. Yuck. And I learned that paprika is supposed to be stored in the refrigerator all the time. Hmmmpf. My frig is already so full, I hated to add to its abundance of jars and bottles that tell me to "Refrigerate after opening." Sigh. Oh well. I bought a good can of "Hungarian Paprika" at the gourmet supermarket (see larger can in photo below). I've had it for some years; it lives in the refrigerator, and has been just fine. But the can is getting low.

As luck would have it, we're going on a trip in a few weeks, and I'll be in Hungary, so I'll definitely stock up on paprika while I'm there. Only problem with buying it there is that the labels are in Hungarian, naturally. I don't speak that language, sorry to say. I bought a couple of small containers the last time I was in Budapest and when I opened them up at home, I found it was something else altogether. Paprika based, a paprika seasoning for making paprikash, but not pure paprika. Hopefully when we're in Budapest, I'll find a store and they'll speak enough English that I can buy replacements. There is a very large spice market in Budapest, right on the river, so I hope to stop there and will find what I need.

Here's the paprika I currently have living in my refrigerator. I use them a lot, actually. A few years ago I attended a cooking class at Sur la Table and the chef used Spanish Smoked Paprika (the smaller can). It was an eye-opening wake up of my taste buds. Loved it. It definitely has a smoky taste. I also have a jar of half-sharp paprika too (oops, I forgot to photograph that one) which I use sometimes. Hungarians use lots of paprika in their cuisine, and they like it in all guises and strengths of mild to hot. But they tend toward the hot. So, the half-sharp (half-hot) is about my speed.

When I was making cooked cabbage, and the recipe called for paprika, I gathered my myriad paprikas and "had at it." This was a recipe from my friend, Karen B, from her archives. It just sounded good, and it is. We like cabbage, but I tend to make it the same-old-way, with bacon, onions, vinegar or maybe apple in it. This is a bit different - with green onions, carrot and beef broth. Since I had some diced pancetta in the refrigerator, I decided to add that to the mixture too. Grating it was too much trouble, so I just diced them. I used young carrots anyway, so that wasn't difficult. This dish comes together quickly, once you have all the ingredients ready to go. It made a great accompaniment to grilled Italian sausages for our dinner. Here's a photo of the onions and pancetta cooking away.

Company Cabbage
Recipe: adapted from my friend, Karen B
Servings: 8
1/3 cup pancetta -- minced
5 cups cabbage -- shredded
1 cup carrots -- shredded or chopped
1 cup green onions -- chopped or 1 whole onion, halved, sliced
3 T butter
1/4 cup beef broth -- or water
1/2 tsp salt
1/8 tsp pepper
1/2 teaspoon Hungarian paprika
1/2 teaspoon smoky paprika
1/2 tsp prepared mustard
1. Have all ingredients chopped and sliced at the start.
2. Melt butter over high heat in large skillet. Add pancetta and saute briefly. (If using a yellow onion instead of green ones, add them with the pancetta and saute both until the onion has started to become translucent, then continue.) Then add cabbage, carrots, and green onions; pour in beef broth or water. Stir to blend, then immediately cover and cook at high heat, stirring several times, until tender and liquid is evaporated, about 3-5 minutes. Add salt, pepper, paprikas and mustard. Stir in thoroughly until blended. Serve immediately.
Per Serving (excluding unknown items): 350 Calories; 35g Fat (88.6% calories from fat); 5g Protein; 6g Carbohydrate; 2g Dietary Fiber; 100mg Cholesterol; 801mg Sodium. Exchanges: 0 Grain(Starch); 1/2 Lean Meat; 1 Vegetable; 7 Fat; 0 Other Carbohydrates.
To view a PDF recipe, click title at top.

Friday, October 12, 2007

A Pumpkin Cake for a birthday


Yesterday was the birthday of one of my DH's friends, Wayne. The "boys" came to our house for Bible study, so DH had asked me to make something special for Wayne. Not a coffee cake, like usual, since they meet at 7:00 am every Thursday. He wanted something that would stand in for a traditional birthday cake.

It just so happened that I used a gift certificate I had from Williams-Sonoma a week or so ago and ordered a pumpkin cake mold. It's just so darned CUTE! The mold comes with a recipe. Good thing, since I wasn't sure what volume of cake would fill the mold to the correct height.

If you haven't already noticed, I don't go in for the frou-frou desserts. I rarely make a layer cake or frosting, etc. 9x13 pans are usually just fine for me. I'm more into the taste rather than the appearance. Some bakers prefer the latter. Go for it, I say. So it's a bit unusual for me to do something like this cake mold. But it wasn't all that hard. The cake recipe was wonderful, I must say. Lots of fragrant fall spices: cinnamon, nutmeg, cloves, ginger, etc. And very moist, which I like. The standout in this recipe is the crystallized ginger. I'm a fan of ginger, period. But chrystallized just adds a wonderful zing to baked goods. There was a chunk of it left on the cake plate this morning. It went immediately into my mouth. Yum.

Certainly this mold will be a seasonal item for William-Sonoma, so if you're interested you might want to check it out soon. It's only available for internet ordering here. $32.00 plus shipping, of course. Here's what the mold looks like (right). It's hard metal, in case you thought it was silicone.

Once the cakes are baked, they sit in the molds for 15 minutes, then you remove them to cool for awhile. Here's a photo of the two halves. What's interesting is you slice off the tops (because they're rounded) so the two halves both have a flat side. Then you flop them together and voila, you have a standing pumpkin. I made a frosting (cream cheese type) and mounded it on the top half, and put some in the middle (between the two halves) also to hold the two halves together.

Pumpkin Cake

Recipe: (Willliams-Sonoma)
Servings: 14
CAKE:
2 1/2 cups all-purpose flour
2 teaspoons baking powder
1/2 teaspoon baking soda
1 1/4 teaspoons salt
2 1/2 teaspoons ground cinnamon
1 1/4 teaspoons ground ginger
3/4 teaspoon nutmeg -- freshly ground
1/2 teaspoon ground allspice
1/8 teaspoon ground cloves
10 tablespoons unsalted butter
1 1/4 cups light brown sugar -- packed
1 1/4 cups granulated sugar
3 large eggs
2/3 cup milk
1 1/4 cups pumpkin puree
2/3 cup walnuts -- toasted, chopped
1/2 cup crystallized ginger -- diced
FROSTING:
8 ounces cream cheese -- room temperature
8 tablespoons unsalted butter
1 cup powdered sugar
1/2 teaspoon vanilla extract
1 tablespoon pumpkin puree -- (optional)
Food coloring, if desired
1. Have all ingredients at room temperature.
2. Position a rack in the lower third of an oven and preheat to 325. Generously grease and flour the Williams-Sonoma pumpkin pan (or two bread pans). Tap out any excess flour.
3. Over a sheet of waxed paper sift together the flour, baking powder, baking soda, salt, cinnamon, ginger, nutmeg, allspice and cloves. Set aside.
4. In the bowl of an electric mixer fitted with the flat beater, beat the butter on medium speed until creamy and smooth, about 1-2 minutes. Add the brown and granulated sugars and beat until light and fluffy, about 5 minutes, stopping the mixer 2-3 times to scrape down the sides. Add the eggs, one at a time, beating well after each addition.
5. Reduce the speed to low and add the flour mixture in three additions, alternating with the milk and beginning and ending with the flour. Beat each addition until just incorporated, stopping the mixer occasionally to scrape down the sides. Add the pumpkin puree and beat until incorporated. Remove the bowl from the mixer. Using a rubber spatula, fold in the walnuts and candied ginger until incorporated.
6. Divide the batter between the wells of the prepared pan and spread it evenly. Bake until a toothpick inserted near the center of one cake comes out clean, about 1 hour and 15 minutes. (If using bread pans, test the pans at about 45-50 minutes.) Transfer the pan(s) to a wire rack and let the cake halves cool upright in the pan for 15 minutes.
7. Gently tap the pan on a work surface to loosen the cake halves. Invert the pans onto a wire rack and lift off the pan. Let the cake halves cool completely before decorating.
8. Frosting: in the bowl of an electric mixer beat the cream cheese on medium speed until smooth, 2-3 minutes. Add the butter and beat until combined, 1-2 minutes. Add the powdered sugar and vanilla and beat until fluffy, 2-3 minutes. Divide the frosting into two bowls and add the pumpkin puree to one of them.
9. Using a sharp, serrated bread knife, gently slice off the rounded tops (about 1/4 inch) of each cake half, so you have a completely flat side. Spread the pumpkin frosting on one half and gently place the top on the bottom cake, lining up the ribs as best you can. Refrigerate for 30 minutes. Frost the top of the pumpkin with the cream cheese frosting (or use it with food coloring to make fancy cut-outs. pumpkin faces or leaves and tendrils). Refrigerate until ready to serve.
Per Serving (excluding unknown items): 510 Calories; 26g Fat (44.2% calories from fat); 7g Protein; 66g Carbohydrate; 2g Dietary Fiber; 105mg Cholesterol; 386mg Sodium. Exchanges: 1 Grain(Starch); 1/2 Lean Meat; 1/2 Vegetable; 0 Non-Fat Milk; 4 1/2 Fat; 3 Other Carbohydrates. To view a PDF Recipe, click title at top.

Thursday, October 11, 2007

Roasted Butternut Squash Soup


The soup library is running a little low these days. I have 3-4 soups lined up on my freezer shelf, but the one I wanted is all gone. I thought I had some left from last winter, but no such luck. Two recipes for butternut squash soup stand out amongst my recipes. This is one of them. This happens to be the more time consuming one to make. The other one, Butternut with Jalapeno, that I posted back in July, is a quicker soup because it's made with C&W frozen squash cubes. Nor is that one roasted, as in this case.


This recipe requires you to buy fresh butternut squash, because you roast the squash halves with onions, carrots and apples. So, no short cuts on this one. But, I guarantee you, you'll be pleased with the results, providing you have the time. I always make this in double quantity (8 pounds of squash to start with) because, well, why not? It's wonderful leftover and easy to freeze.

Previously I've mentioned Penzey's, the herb and spice company from whom I buy many of mine. If you order from them (or request it) they send out a catalog periodically, and usually there are 3-4 recipes contained in each little brochure. This came from one of those, a few years ago. Credit goes to a cookbook (that I don't have, in case you're counting) called The New England Cookbook, by Brooke Dojny. She's one smart cookie when it comes to soups.

So what's involved, you ask? You cut the squash in halves, remove seeds, lay them in a large roasting pan (a really big one if you're making a double batch) and add onions, apples and carrots and some fresh rosemary. Dot it with some butter, brown sugar and add a bunch of APPLE JUICE, cover and roast for about 2 hours. The vegetables become succulent, and somewhat sweet because of the apples and apple juice. Because I'd rather not peel the squash, I leave them unpeeled and scoop out the flesh after it's baked. Same with the onions - cut in half and remove skins later. The other little trick to this is the fresh rosemary. I do not like the rosemary to remain in the soup for eating, so I try to use a fresh sprig or two or three and leave them intact while baking, then toss it out, retrieving all the little pieces floating in the apple juice. Or, you can strain the whole mess to get them out.

Once the roasted vegetables have cooled a little (and you scoop out the squash flesh, remove onion skins, etc.), you can add it all to a large soup pot and use an immersion blender (or put it in batches in the regular blender or food processor) to puree all of it. Then you add a few other ingredients, taste it for seasonings, simmer briefly, then add milk (I use fat-free half and half) or cream to smooth it out.

If you don't like soups with a hint of sweet, pass this one by. But if you don't mind the sweeter flavor from the apples and apple juice, this one's a winner.

Roasted Butternut Squash Soup
Recipe: Adapted from the New England Cookbook by Brooke Dojny
Servings: 4
4 pounds butternut squash -- or pumpkin
2 tablespoons butter
1/4 cup brown sugar
1 large onion -- peeled, chunked
3 large carrots -- peeled, chunked
4 large garlic cloves -- whole, unpeeled
1 large apple -- peeled, chunked
2 teaspoons dried rosemary -- or 1 T fresh
8 cups low sodium chicken broth
2 cups apple juice
1 teaspoon ground ginger
1/2 teaspoon ground mace
1/4 cup pecans -- minced

salt and pepper
1 cup fat free half-and-half
1. Preheat your oven to 350. Cut the squash in half (I use a rubber mallet to pound the knife blade as the large squashes are usually quite unwieldy to cut). Scoop out the seeds with a spoon. Place the halves cut side up in a very large roasting pan. Divide the butter and brown sugar among the cavities. Arrange the onion, carrots, garlic and apple around the squash. Sprinkle with rosemary, then salt and pepper. Pour 2 cups of the chicken broth and apple juice around the vegetables and cover the pan tightly with foil. Roast in the preheated oven, stirring once or twice (if you remember, that is) until the vegetables are all very sort and somewhat caramelized, about 2 hours.
2. Open up the foil and allow the vegetables to cool at least 15 minutes. Scoop out the squash pulp, being careful not to include any skin. Remove the garlic from their skins. Process all the vegetables and apple mixture in a food processor, in batches if necessary, adding enough remaining chicken broth to achieve a smooth puree. Add the fat free half and half.
3. Toast the pecan pieces in the oven for a short time, or use a nonstick skillet. Don't burn! Set aside until ready to serve the soup. Transfer the puree to a large saucepan, add the ginger and mace and season with salt and pepper as needed. Bring the soup to a boil, under gentle heat and simmer for a few minutes to meld the spices. Serve the soup in bowls sprinkled with toasted pecans.

NOTES : The original recipe called for fresh pumpkin or squash, and used 6 Tb of butter. I preferred to have a creamy look to the soup, so add the fat-free half and half. It's not a necessary ingredient. When I make it, I always double it since it is such a favorite around our house. I just scoop it into plastic freezer bags in serving size portions (about 2 cups per person) and lie flat on a large cookie sheet until frozen solid. The original recipe also added a dollop of sour cream or creme fraiche, but I prefer the minced nuts. I prefer not to have the pieces of rosemary in the soup, so I strain the soup to remove most of it. Or, better yet, if you use fresh rosemary you can just remove the entire sprig. If you want to make the vegetable preparation easier, use a potato peeler on the squash before it's baked, and remove the garlic from its skins; if you do that, you don't have to handle the squash at all after it's baked.
Per Serving (excluding unknown items): 563 Calories; 11g Fat (17.3% calories from fat); 28g Protein; 94g Carbohydrate; 11g Dietary Fiber; 16mg Cholesterol; 1198mg Sodium. Exchanges: 3 Grain(Starch); 2 1/2 Lean Meat; 1 1/2 Vegetable; 1 Fruit; 1/2 Non-Fat Milk; 2 Fat; 1/2 Other Carbohydrates.
To print a PDF recipe, click title at top.
(photo from kraftfoods.com)