Thursday, January 31, 2008

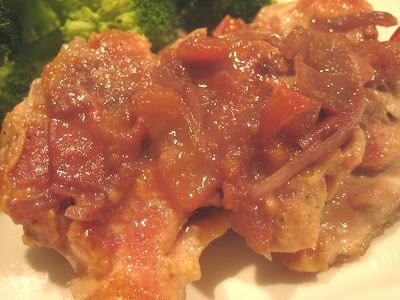
Pork Chops with Apple Cider Sauce


Apologies for the poor picture quality. It's one thing to take a photo of food when it's just my DH and myself. He teases me about it, and loves to regale people with examples of when he's poised over his lovely plate of steaming food and I rush in with my camera and yell "wait!" It's another when we have a table full of guests and I'm poking around trying to take pictures in front of them. Tacky, tacky. So I snapped this picture on my own plate, as surreptitiously as possible, so it was a bit dark at our candlelit dining table.


My dinner menu the other night, when we entertained 4 friends for dinner:

As usual, I started my menu plan with the main entree. It needed to be the set of 6 pork chops I had in the freezer from Niman Ranch. I've mentioned theis meat producer before - they are a small independent farm that raises livestock the old-fashioned way. No growth hormones. Natural feed, no additives. All that good stuff. I'm on their email notification list, so every time they have a sale, I know about it. Mostly I've ordered pork, but also their steaks too. I'm crazy about their bacon, but it's carried at my local Trader Joe's at a pretty good price.

Everything I've ordered from Niman ranch has been exceptionally good. Worth the price? Well, I guess it's relative. Compared to grocery chain meat, this is just far and away better. But if you're on a budget, probably not. I don't order all my meat from them - just special stuff. If you happen to decide to try them out - do wait for a sale - and make sure they pack in small packages (like 2 pork chops per pkg). That's why I hadn't defrosted these before, because I needed to wait for an occasion when I had exactly 6 people.

Because pork is raised so leanly now, there isn't as much fat to keep the meat moist. So I always brine pork. I've tried several recipes, but my current favorite is a mix that I buy at Whole Foods called V Traditional Brining Blend, and V Spicy Brining Blend. They come in 12.7 ounce jars. If you prepare the brine per the instructions you'll likely use most of a jar. I disregard those instructions and make a much smaller solution. This time I used about 2 tablespoons of brining salt and dissolved it in about a cup of boiling water, then added ice cubes to cool it off quickly. Usually I stick my finger in the brine to taste the saltiness - you want it to be salty, but not overwhelmingly salty, otherwise your meat will become the same. Then I immersed the pork in the brine. If time is of an essence, I'll put them in my aerator (a plastic container that removes the air by vacuum pump and supposedly increase the marinating ability chop-chop). That I did, and let them rest in the refrigerator for about 6 hours or so. I removed them once and turned them over in the liquid, since the brine didn't completely cover the chops.

I pan-seared the chops, then used a probe thermometer so I'd know exactly when the meat reached 145 degrees F. Worked like a charm. Result: these chops were just "the best." And America's Test Kitchen scored a winner with the sauce recipe. Although, next time I will probably thicken the sauce some with some cornstarch. Even though I reduced it down, it was still a bit thin. But, Niman Ranch scored a touchdown with the meat. One great dinner.

Pork Chops with Apple Cider Sauce Sauce
Recipe By: America's Test Kitchen
Servings: 4
32 ounces boneless pork top loin chops -- 4 chops, about 1 1/2 inches thick
Salt & pepper to taste

APPLE CIDER SAUCE:
1 1/2 cups apple cider -- or apple juice
1 cup low-sodium chicken broth
2 teaspoons cider vinegar
1 whole cinnamon stick
4 tablespoons unsalted butter -- cut into 4 pieces
2 large shallots -- minced, about 1/2 cup
1 whole tart apple -- Granny Smith, peeled, cored, sliced
1/4 cup Calvados -- or apple flavored brandy
1 teaspoon fresh thyme -- minced
Salt and pepper to taste
1. Brine the pork chops with a mixture of your choice.
2. Combine cider, chicken broth, and cinnamon stick in a medium saucepan. Simmer over medium-high heat until the liquid is reduced to one cup, about 10-15 minutes. Remove cinnamon stick and discard. Set aside.
3. Preheat oven to 425. Drain brine from pork chops, dry thoroughly, then season pork chops with pepper. Heat a heavy saute pan and add about 1 tablespoon of olive oil to pan. Quickly sear both sides of the pork until caramelized and golden brown. Remove chops to a heatproof pan, insert meat thermometer and bake until the pork reaches 145 degrees F. Remove from oven and loosely place a piece of foil over the top while finishing the sauce.
4. While pork is baking, in the same skillet you seared the pork, add a tablespoon of butter. Heat under medium-high heat, and when it's melted and foam subsides, add shallots and apple. Cook, stirring occasionally until softened and beginning to brown. Remove from heat and add the Calvados. Return to heat and cook about one minute, scraping bottom of pan with a wooden spoon to loosen browned bits. Add the reduced cider mixture and simmer until thickened slightly, and reduced to about 1 1/4 cups, about 3-5 minutes. Off heat whisk in remaining 3 tablespoons of butter, and adjust seasonings with salt and pepper.
5. Pour sauce with apples over each piece of pork and serve immediately.
NOTES : You might want to thicken the sauce more than the recipe indicates by using a tablespoon of cornstarch and a bit of water. Heat through until thickened.

Per Serving: 478 Calories; 22g Fat (44.3% calories from fat); 44g Protein; 19g Carbohydrate; 3g Dietary Fiber; 133mg Cholesterol; 100mg Sodium. Exchanges: 0 Grain(Starch); 6 Lean Meat; 0 Vegetable; 1 Fruit; 2 1/2 Fat; 0 Other Carbohydrates.
Printer-friendly recipe, click title at top.

Wednesday, January 30, 2008

Mashed Potatoes with Mascarpone


Ah. Mashed potatoes. With some little puddles of melted butter. What's there not to like, I ask you?


When I was planning the menu for the dinner I did the other night, I wanted something to go with the pork chops and apple cider sauce. Something that would also be a vehicle for the sauce. I could have made plain rice (which I admit, sounded the best), but somehow the cider sauce didn't sound good with brown rice. I rarely make white rice anymore. I actually don't make mashed potatoes much either. Last time was Thanksgiving dinner. But, after pondering my menu, I decided mashed potatoes were the best fit. But not just plain mashed potatoes. Once I consulted my recipe collection I knew the mashed potatoes with mascarpone was the right one. It has tons of chopped Italian parsley in it, and of course, an ample amount of mascarpone.


Probably most people think mascarpone is used mostly for desserts. And here in the U.S., I suppose it is. But after all, it's just a cheese. Something like cream cheese, but made a bit differently. It has a consistency that's in between sour cream and cream cheese, and it has a very creamy taste. The credit for this recipe goes to Tarla Fallgatter, a cooking instructor here in our part of the world.


You cook the potatoes with the green onions, which flavors the potatoes throughout. Then you mash them by hand (you want a few lumps) and add in the mascarpone, a bit of the water you cooked the potatoes in, and a mound of chopped Italian parsley. Season it, and you're done. Making this recipe seemed like the right option since I could make this ahead. Once made, I plopped the whole batch into my crockpot and set it to low, then scooped it out into a serving bowl at the last minute. Delicious.


Cook's Notes: be sure to save a cup of the potato water when you drain the potato and green onion mixture. And be careful adding white pepper - it's more potent than black pepper.

Mashed Potatoes with Mascarpone
Recipe: Tarla Fallgatter, cooking instructor
Servings: 8
3 pounds Yukon gold potatoes -- scrubbed
2 bunches green onions -- coarsely chopped
1 1/2 cups Mascarpone cheese -- room temperature
1/4 cup Italian Parsley -- chopped

Ground white pepper and salt -- to taste
2 tablespoons unsalted butter
1. Cut the potatoes into large chunks if they're big. Cover with water in a large saucepan and add green onions. Add salt, cover and simmer for about 25 minutes.
2. Drain potatoes, reserving about 1 cup of the cooking water. Return potatoes to the pan and coarsely mash them with a potato masher, add cheese, parsley and some of the cooking liquid if they are too stiff. Add additional liquid to make the right consistency. Season to taste with salt and white pepper. Keep warm in a low oven until ready to serve.
NOTES : Be careful of the white pepper - it's powerful stuff.
Per Serving (excluding unknown items): 263 Calories; 13g Fat (43.9% calories from fat); 5g Protein; 31g Carbohydrate; 2g Dietary Fiber; 37mg Cholesterol; 25mg Sodium. Exchanges: 0 Lean Meat; 0 Vegetable; 2 1/2 Fat.
Printer-friendly recipe: click title at top.

Tuesday, January 29, 2008

Red Cabbage with Apples & Chestnuts


The finished photo of this is a bit blah-looking. You know, cabbage begins to look a little grayish if cooked through. So fortunately I did snap a photo of it when I added the apples and chestnuts, still in the pan. Next time I won't pop this in the oven, but serve it directly from the range top. I was trying to get some things made ahead, so popped this in the oven to reheat. So the cabbage cooked more than I would have liked. Therefore, don't do as I did in this case, but cook this just before serving.


We entertained the other night, and I had some wonderful boneless pork chops to serve our guests, and wanted something appropriate to go with. Enter cabbage. I scrounged around the internet trying to find a recipe that suited me. How could I tell? I can't begin to tell you - I just read a recipe and either I like the sound of it, or I don't. I knew I wanted to use red cabbage and apples, probably onions, maybe shallots. So a search produced a bunch of options, and this is the one I chose. I'd make this again, but I'd omit the chestnuts. To me, they didn't add that much to the dish. Maybe even distracted me. Some people aren't so fond of chestnuts anyway. But I loved the apples in it, and it's very low fat and low calorie. As one of our guests said, pure comfort food.


Cook's Notes: Don't be tempted to put the apples in early. You want them to still have texture and shape. To be barely cooked. The onions and shallots add a nice character depth. One large head of cabbage will make enough to feed about 10 people. Maybe more. And be sure to make this just before serving. Long cooking only grays the vibrant color of the red cabbage.

Red Cabbage with Apples & (Chestnuts)
Recipe: Vegalicious.com
Servings: 10
2 tablespoons vegetable oil
2 whole shallots -- peeled, diced [I added these]
2 whole red onions -- thinly sliced
1 head red cabbage -- thinly sliced
1/2 cup red wine vinegar -- or apple cider vinegar
6 tablespoons water
3 tablespoons sugar -- or sugar substitute
1 teaspoon allspice
1 teaspoon ginger
1/2 teaspoon cinnamon

salt and pepper to taste
2 whole Granny Smith apples -- cored, peeled, cut in small pieces
8 ounces chestnuts -- canned, drained, chopped [or, omit]
1. Heat oil in large frying pan over medium-low heat. Add onions and shallots; saute until soft, about 5 minutes.
2. Add cabbage, vinegar, water and sugar. Add the seasonings Cover; cook until cabbage is tender, stirring occasionally, about 30-40 minutes.
3. Cut the apple into small pieces and add to the cooked cabbage. Add chestnuts; cook until warmed through, about 10 minutes longer. Season with salt and pepper. Serving Ideas : Ideally, serve with sausages or pork of some kind.
NOTES : You need a very large pan to make this. Or, divide the recipe into two pans, then combine at the end when the cabbage and onions have reduced down.
Per Serving: 118 Calories; 3g Fat (24.7% calories from fat); 1g Protein; 22g Carbohydrate; 3g Dietary Fiber; 0mg Cholesterol; 4mg Sodium. Exchanges: 1/2 Grain(Starch); 1/2 Vegetable; 0 Fruit; 1/2 Fat; 1/2 Other Carbohydrates.
Printer-friendly recipe: click title at top.

Monday, January 28, 2008

Herb Dip with Secret Ingredient


If I were to tell you what the main ingredient was for this dip, you'd probably just scroll right on by, delete this post, turn up your nose perhaps, or laugh. So you'll have to read down a bit before I divulge.

This dip came about because some years ago my DH and I went on a mostly vegetarian diet. DH had a heart attack in 1997. He survived, with minimal heart damage, but the doctor told him afterwards that he needed to lose some weight. So we both went on an extremely low fat, vegetarian diet. We consulted a nutritionist to make sure we were going in the right direction. This, coming from two carnivores here, was a huge - I mean HUGE - divergence for our lifestyle.

To say that I struggled with this diet - preparing the food - is a gross understatement. I admit it - I like meat. Even a thick steak now and then, as readers of this blog know. I had cookbooks coming out the ying-yang, as they say, and consulted them all. I read Dean Ornish from cover to cover. I didn't adhere quite to his recipes, but close. We ate fruit smoothies for breakfast every morning. And some eggs, so I guess that made us omnivores actually. And the weight came off. Off Dave. Not so much off me. I couldn't believe it. I was so discouraged. I really thought he'd lose 40 pounds, and maybe I'd lose 30.

I could go on and on with this story - another time perhaps - but after 6 months DH HAD lost 40 pounds (I'd lost 15). The doctor was very pleased. But DH was anemic. The nutritionist insisted Dave needed to eat chicken and fish. Okay. Added that back into our diet. Tasted GREAT, I might add. Weeks went by and DH was still anemic. The nutritionist told us to eat lean beef at least once a week. That was our undoing, I'm afraid.

During that period of vegetarianism, I tried all kinds of things I'd never have done before. No matter what I did, I couldn't seem to make most food taste all that good. It was okay, but not more than that. Without cooking with fat, in some form or another, our food just tasted bland. I craved meat. Butter. Cookies. Chocolate (I sneaked a few). I made a big bean salad regularly that DH was supposed to dig into every day (beans are high in iron). He ate apples (also high in iron) every day. But he kept losing weight, and he was still anemic. So when the nutritionist said you'd better have some beef at least once a week, I began introducing beef into our regular fix-at-home diet. I cooked some with a cast iron skillet too, which helped (food cooked in cast iron leeches out some of that iron into our bodies), but it wasn't enough to get his anemia under control. So, we kind of reverted to our former diet of eating most things. He's still on the anemic side, but he takes a supplement, and since we eat meat (whether it be chicken, fish, pork, lamb or beef) several, if not 7, nights a week, he doesn't any longer have a problem.

So back to this post. Trying to find things that had high flavor, but low fat and no meat, was a challenge. I spent more time in the kitchen, cooking (mostly chopping and prepping) than I ever have in my life. And I was always looking for something new and different. This dip fit the bill on all fronts. It came from a cookbook I own called Cal-a-Vie's Gourmet Spa Cookery. The book is out of print, and this is the only recipe I've liked from the book. So now, the secret: tofu.

I'm not a fan of tofu. I don't much like its texture - even in Chinese or Asian stir frys, hot and sour soup, etc. So normally I avoided it whenever possible. I still do if offered it straight away. I mean . . . it's so blah. And spongy. Not a texture I like except in custard. But, as I learned with this dip, tofu is a "vanilla" substance. It absorbs flavors from the food around it. So, enter: garlic, cilantro, cumin, hot chiles, etc. and you've got a wonderful - LOW FAT combo.

Rarely do I tell people what's in this dip - most people guess it has beans or hummus in it. Nope. Nope. No, no sour cream. No cottage cheese. No, no yogurt either. I don't believe anyone has ever guessed it.

Cook's Notes: buy soft or "regular" tofu. I have used nonfat tofu, but the flavor is a bit better with full fat tofu. There's not a smidgen of other kinds of fat in this dip, and tofu's fat is all unsaturated, so I go for the gold here. If you don't like spicy food, reduce - or eliminate - the chile pepper. Be sure to mince up the chile pepper well - scrape down the workbowl to make sure. You can use the finished sauce as a sauce on vegetables, or even on pasta, or over potatoes. But the dip is just the best form, served either with vegetables or crackers. I toasted pita wedges this time.

Hot & Spicy Tofu Dip
Recipe: Cal-a-Vie's Gourmet Spa Cookery
Servings: 20
1 pound tofu -- soft
5 cloves garlic
1 small jalapeno chile pepper -- seeded [I used a serrano]
1 bunch fresh cilantro -- rinsed and drained
1 bunch green onions
2 tablespoons fresh lime juice
2 tablespoons orange juice
1 tablespoon ground cumin
1 tablespoon low-sodium soy sauce
1 tablespoon honey -- or Splenda, or brown Sugar Twin (and don't add any more, as this is sweet enough)


1. Have all ingredients ready beside your food processor. Allow tofu to drain a few minutes before beginning. Start the motor and add the jalapeno pepper and allow to mince finely. Add garlic cloves in same manner. Then add cilantro, green onions, juices, cumin, soy sauce and sweetener.
2. Cut tofu into smaller chunks and add to bowl, then process until smooth.
3. Chill for several hours. Will keep for many days.
NOTES : The recipe says to serve as a dip for artichokes or an array of vegetables. Also works well with crackers, baked pita bread. Could also be used as a topping for plain food (vegetables, grilled chicken) or baked potatoes.
Per Serving (excluding unknown items): 25 Calories; 1g Fat (38.5% calories from fat); 2g Protein; 2g Carbohydrate; trace Dietary Fiber; 0mg Cholesterol; 32mg Sodium. Exchanges: 0 Grain(Starch); 1/2 Lean Meat; 0 Vegetable; 0 Fruit; 0 Fat; 0 Other Carbohydrates.
Printer-friendly recipe, click title at top.

Sunday, January 27, 2008

California Thunderclouds


We very rarely have views like this. Thunderclouds - or big massive cloud formations are more a standard in the midwest than here on the California coastline. But the other day, just after we'd had a couple days of rain, this was the view from our hill. This shot was taken facing northwest. If the visibility had been better, you might have been able to see the skyline of downtown Los Angeles just to the left of the two palm trees. It's very rare that we can see those far off images since downtown LA is about 45 miles away. But on occasion we do see it.

Friday, January 25, 2008

Blue Chip Chocolate Chip Cookies


I must admit that when I read this recipe the first time, I thought "it's just another variation on chocolate chip cookies." Why fool with a good thing, my mind said. I've relied on the good-old Tollhouse (Nestle's) recipe, and never been unhappy with it. But the further I read into Smitten Kitchen's blog, the more I became convinced I'd best try this recipe. When you read the list of ingredients you definitely will think this is not all that different. Yes, more chips. And more nuts. But really, what's that mean but just a more densely populated cookie? But then you read the details, and you find out that there really are some differences:

1. You must start with cold butter

2. The nuts are toasted

3. The nuts are chopped finely so they almost disappear in the cookie

4. The cookies are baked differently - on parchment in a 300 degree F. oven for a long time

And are they a radical change? Well, maybe radical is too strong a word. Are they different? Yes. The texture is different - they're nicely crumbly and crisp. There is definitely something different about the nuts - besides the fact that there are a LOT of nuts (and chips) in these cookies. But having toasted the walnuts makes a huge difference. I used my food processor to chop the nuts, and did just as the recipe indicates - lots of the nuts were crumbs, but there were some pea-sized pieces in there too. Nothing larger, though. To say that I loved these is putting it mildly. These may be my favorite chocolate chip cookie recipe from henceforth. Smitten's recipe came from David Liebovitz's book, The Great Book of Chocolate. I made no alterations to this recipe. My hat's off to Deb for passing on Liebovitz's recipe to all of us chocolate chip cookie fans.

Cook's Notes: Having read some of Smitten's comments - a couple of people had problems with them - I got everything prepped before I started mixing the cookies. The problems others had, I believe, might have been caused by the butter not being thoroughly chilled when they started making the cookies. Or, it could have been the type of butter used. So, my oven was hot. The dry ingredients were combined. The eggs and vanilla were standing by. The cookie sheets were ready. I chopped up the butter into the 1/2 inch cubes then put them back in the refrigerator while I did all the other prep work. Once I began to mix the cookies they took little more than a minute or two to be ready for plopping onto the parchment-lined cookie sheets. They took longer to bake - the recipe indicates 18 minutes. Mine took about 22, and my oven runs hot, so was surprised.

"Blue Chip" Chocolate Chip Cookies
Original Recipe: The Great Book of Chocolate by David Liebovitz
Source: Deb at the Smitten Kitchen Blog

Servings: 20
1/2 cup granulated sugar -- (100 grams)
1/2 cup firmly packed light brown sugar -- (120 grams)
8 tablespoons unsalted butter -- (115 grams) cold, cut in 1/2 inch pieces
1 large egg
1 teaspoon vanilla extract
1/2 teaspoon baking soda
1 1/4 cups all-purpose flour -- (175 grams)
1/4 teaspoon salt -- or 1/2 teaspoon flaky sea salt
1 1/2 cups semisweet chocolate chips -- (200 grams)
1 cup walnuts -- or pecans, (130 grams) toasted and VERY finely chopped
1. Adjust the oven rack to the top third of the oven and preheat to 300F (150C). Line three baking sheets with parchment paper.
2. Beat the sugars and butters together until smooth. Mix in the egg, vanilla, and baking soda.
3. Stir together the flour and salt, then mix them into the batter. Mix in the chocolate chips and nuts.
4. Scoop the cookie dough into 2 tablespoon balls and place 8 balls, spaced 4 inches (10cm) apart, on each of the baking sheets.
5. Bake for 18 minutes, or until pale golden brown. Remove from the oven and cool on a wire rack.
6. Store at room temperature in an airtight container for up to 3 days. (I always freeze my cookies)
NOTES : Make sure the butter is cold. Make sure walnuts are very finely chopped - with some pieces as large as a pea, but with some almost a powder.
Per Serving: 212 Calories; 12g Fat (49.3% calories from fat); 3g Protein; 25g Carbohydrate; 1g Dietary Fiber; 23mg Cholesterol; 66mg Sodium. Exchanges: 1/2 Grain(Starch); 0 Lean Meat; 2 1/2 Fat; 1 Other Carbohydrates.
Printer-Friendly Recipe, click title at top.

Thursday, January 24, 2008

Carrot-Ginger Slaw


Do you sometimes forget how good vegetables can taste? I forget about all the variations on vegetables. I need a little memory jog now and then to remind myself that there's more than one way to make cauliflower. Or broccoli. Or zucchini. Or. Or. Or. It could go on and on.

And surely I forget about using carrots - in a raw form, other than eating out of hand. So I was reading Fresh Approach (a blog I read regularly) and Rachael had made this carrot-ginger slaw. Well, my eyes and nose perked up and I immediately printed out the recipe. I had everything on hand except the fresh ginger. But I had some in a bottle, which I'm sure wasn't AS good, but this salad was so refreshing (next time I really will have the fresh ginger). I have Italian parsley in my garden, but I had an abundance of cilantro in my refrigerator, so I used cilantro instead. DH loved it. So did I. And it took a maximum of about 7 minutes to make it. Literally. That part I liked a lot. And it was better than having another - yet another - green salad. Don't get me wrong, I love green salads. Really I do. But there's a tedium about making green salad. And I like homemade dressing too, which adds to the hassle.

When my daughter, Dana, was a little tyke, she first learned how to bake cookies. That's probably universal in this day and age. Children and cookies just go together like peas in a pod. Or puppies and little boys. Once she got a bit older I began teaching her about knife skills. Probably when she turned 8 or so, and I thought she was mature enough to hold and wield a dull knife.

Initially, she was thrilled with her new-found skills and independence. She liked helping in the kitchen, and was very proud of her accomplishments. But the interest began to wane in the years to follow. I was a working mom, had to get dinner on the table in fast order, so setting the table and making a salad was what helped me the most. She wasn't old enough or tall enough really to master a spatula and frying pan at the hot stove, or many other things with hot pots and pans, so the salad making was the best choice. As she got older still she began to dislike making a salad unless it was just chopped lettuce. I like lots of vegetables in my salads. Back then it was mostly carrots, celery, green onions, tomatoes and peppers. Now I add lots of other things like fennel, Feta crumbles, sugar snap peas, nuts, even. But she didn't enjoy the chopping and cutting anymore, probably because it was so repetitive.

Here's the salad maker now, a picture taken when we were at Dana and Todd's house over Christmas - she's 39 now. When I was 39, she was 13, going on 30. But that's another story. Now she makes salads all the time for her family. And mostly they're just lettuce. Her kids don't much like eating raw vegies. They look at salad as merely a vehicle for consuming ranch dressing. But Dana thoroughly enjoys all the homemade dressings. When we talked on the phone the other day she was busily making her favorite of my dressings, the VIP Salad Dressing, which I posted last year. It may have been my very first posting on this-here blog. Or one of the first. And that dressing is still one of my very favorites too.

Last summer Dana's two children were here to visit for awhile, and the 10-year old, Taylor, was anxious to help me in the kitchen, so I taught her how to make salad. How about that. What goes around, comes around. Dana was a bit in shock when I told her I'd taught Taylor how to use a sharp knife. She did just fine, sweetie! Mom knows all. That's a bit of an inside family joke if you didn't get it. Dana reads my blog every day, so am certain I'll be hearing from her about that! Anyway, I just listened to someone on the radio the other day, that most children, when they reach about 7 or 8, are old enough to learn how to use a knife in the kitchen.

So, I've rambled on far too long here. Telling family stories. Suffice that this not-green-salad is a good one, a keeper, but probably not one for children to make unless an adult grates the carrots and ginger. Other than that, children could likely do all the rest. If it's a kid-making deal, maybe start them out with green salad and teach them some knife skills.

Carrot Ginger Slaw
Recipe: Fresh Approach blog
Servings: 6
6 whole carrots -- peeled
1 cup chopped parsley
2 teaspoons vegetable oil
3 tablespoons seasoned rice wine vinegar
1/8 teaspoon ground Szechuan peppercorns
3 tablespoons fresh ginger -- grated - use a Microplane
1/4 cup mayonnaise
1 teaspoon sesame oil Sesame seeds and more parsley for garnish
1. Using the large holes on your box grater (or the shredder disc on a food processor), shred the peeled carrots.
2. Toss that with the parsley.
3. In another bowl, combine the oil, vinegar, Szechuan pepper, ginger (and the juice), mayo and sesame oil. Taste and adjust to your taste.
4.Stir that into the carrots, let rest for a few moments, garnish and serve.
Per Serving: 135 Calories; 10g Fat (64.9% calories from fat); 1g Protein; 11g Carbohydrate; 3g Dietary Fiber; 3mg Cholesterol; 345mg Sodium. Exchanges: 1 1/2 Vegetable; 1 Fat.
Printer-friendly recipe, click title at top.

Wednesday, January 23, 2008

Pan-Roasted Pork Tenderloin w/Balsamic-Fennel Confit


You know. It's January. We're supposed to be trying to make some lower calorie meals. After the excess of the holidays. But, you know how it is - you get tired of chicken breasts, stir-frys, and salads. So you go to the source - the cookbooks or the files - and find something new. Something more interesting. Something different. It wasn't hard - I have a huge inventory of cookbooks and folders and folders of clipped recipes. I pulled out one of the diet-type files I have - low-fat entrees - and found about 50 recipes in the file. At least half of them were for pork, which appealed to me. A big shopping spree at Costco, and a couple of hours of putting away stuff and re-proportioning the meat I bought, and I was ready to think about dinner.

For Christmas, at my suggestion, my DH gave me a FoodSaver vacuum packaging system (from Costco). I'd been reluctant to get one, even though a few people had recommended it. I went online and read reviews and settled on the FoodSaver 2940, which got better write-ups than others. I finally unpacked it yesterday, watched the DVD with demonstrations of packaging up all kinds of items. So today I bought a big pork roast and 4 tenderloins. I cut up the roast into 3 pieces and pressed the magic button and wh-o-o-o-p it sucks out all the air. It was FUN. (Sometimes I'm easily amused, especially with any new kitchen toy.) I separated the tenderloins and sucked 3 of those into separate packages. The 4th tenderloin became our dinner. The 2940 doesn't look exactly like this, but close.

So, I digress talking about my new toy. Back to dinner. I really like fennel. I like it raw - just to eat like celery, and I like it cooked - when it renders itself into silkiness, almost. I'd clipped the original recipe from one of Williams-Sonoma's catalogs. The recipe resided next to the write-up about "infused" balsamic. A mere 6 ounce bottle for $19.00. I didn't buy it (aren't you proud of me?). But I thought the recipe was intriguing, so I substituted, as we cooks are wont to do. I couldn't find nary a fresh sage leaf in two stores yesterday (I know, they're out of season, but I still thought the grocery store would have them anyway). Wrong. So I used powdered sage. Surely not the same thing, but the closest I could get. And, I didn't have this infused vinegar. But I DID have some wonderful fruit-infused balsamic that I thought might work. Indeed it did.

First you brown the pork tenderloin, remove it, then saute the fennel and shallots. I sliced the fennel in about 1/4 inch slabs. Maybe not the right configuration for this dish - next time I'd do what the recipe said - in 1/4 inch strips. The slices of fennel would work well in a baked dish, but this fennel needed to be tossed in the frying pan. A tad difficult with this large pieces. Awkward is all I can say. But, my own fault. Once the fennel is nearly cooked through, you add the balsamic. Put the pork tenderloin on top of this vegetable mixture and bake in a very hot oven until the pork is just pink through (145 degrees F), remove the fennel, then the pork to a cutting board and cover with foil briefly while you whisk the remaining sauce over high heat. The pork was perfectly cooked (pink in the middle) and the fennel (W-S calls it a confit) was kind of like a vegetable relish in a way. Not exactly like a side vegetable, but it was that too. Whatever it was, it was delicious.

Pan Roasted Pork Tenderloin with Balsamic-Fennel Confit
Recipe: Adapted from a Williams-Sonoma recipe
Servings: 4
24 ounces pork tenderloin -- (two loins)
1 tablespoon olive oil
1 tablespoon butter
3 whole fennel bulbs -- sliced in 1/4 inch slices
2 whole shallots -- sliced
6 tablespoons Balsamic Vinegar with Pomegranate -- or infused balsamic vinegar
1 tablespoon fresh sage -- chopped
1/2 cup low-sodium chicken broth
salt and pepper to taste
1. Preheat oven to 450.
2. Season pork with salt and pepper. In a large ovenproof frying pan over medium-high heat, warm the oil and butter. When hot, brown pork for 3-4 minutes on each side until the meat has begun to caramelize. Transfer meat to a platter.
3. To the same frying pan add the slices of fennel and shallots. Saute, stirring, until the fennel is tender and golden, 6-10 minutes. Add 2 T. of the balsamic vinegar and cook, stirring, until nearly evaporated, about 2-3 minutes. Season sauce with salt and pepper to taste. Stir in half the sage leaves.
4. Nestle the pork tenderloin on top of the fennel, sprinkle with the remaining sage. Use a meat probe in the center of the meat. Transfer pan to the oven. Bake until the thermometer reaches 145 degrees, about 15-20 minutes, or until done to your liking.
5. Remove from oven and transfer pork to a cutting board. Loosely cover with foil. Allow to sit while you complete the sauce (about 5 minutes).
6. Set pan over medium-high heat. Add broth and 4 T. of the balsamic vinegar and bring to a boil. Cook until liquid is reduced by half, about 4-6 minutes. Slice the pork to about 1/2 inch medallions. Arrange pork slices of fennel on a heated platter and drizzle the top with the pan sauce. NOTES : If you don't have the Balsamic with Pomegranate, use some other kind fruited balsamic. The original recipe called for "Infused Balsamic Vinegar," available at Williams-Sonoma. It's an intense, reduced syrup almost, in either a rosemary or garlic flavor. Be sure to cook the fennel until it's nearly cooked before adding the vinegar. You want to caramelize the edges of the fennel, which enhances its flavor. And whatever you do, don't overcook the pork - you want it to be just barely pink in the middle.
Per Serving: 337 Calories; 13g Fat (33.3% calories from fat); 39g Protein; 18g Carbohydrate; 5g Dietary Fiber; 118mg Cholesterol; 219mg Sodium. Exchanges: 1/2 Grain(Starch); 5 1/2 Lean Meat; 0 Vegetable; 1 1/2 Fat.
Printer-friendly recipe, click title at top.

Monday, January 21, 2008

My Kitchen Blog Station


This is one side of my kitchen. When I designed this new kitchen 2 years ago, I knew I wanted a place where I could sit down with my recipes. My red-topped Dell laptop sits here at all times. I change the message that scrolls across the screensaver now and then. Right now it says "Are you ready for Valentine's Day?" The background is red, the type in white. This area is also my baking center. Behind those wood backsplashes (behind the laptop) are appliance garages that house my Kitchen Aid mixer, blender, food processor and toaster. The lowest drawers below are a specific height to house my big plastic Tupperware bins of flour and sugar. Above on the left I keep my spices (you already saw the herbs - they live over by the range).

Hanging up above the laptop is a fold-down TV screen (it's small) and DVD player. Sometimes when I sit here I turn on morning television. I do most of my blogging early in the morning. The laptop houses all of my photography, there's a convenient USB hookup here for my digital camera, and my main MasterCook cookbook (my own) gets updated here. Sometimes I have stories already composed, and I merely have to press a few keys and it's posted on those internet highways. Other times, like today, for instance, I didn't have a story ready and had to write one. Often I write up posts in the evening after I've prepared dinner. After the pictures are taken, the last morsel digested. My loving DH always does the dishes, bless his heart, so after I put away any remaining food, I can go upstairs to my home office (where my Tivo lives, another gadget that I adore) and do whatever I want.

Our main family room is to the far left of this picture above and our much larger screen TV, so I can only listen to my little TV when my DH isn't there.

Our family room, from the kitchen
Since there aren't all that many spices, they are confined in a relatively small space on two lazy susan rounders. I even have a tad of empty space up there on the top shelves. Only reason is that I can't reach up that far without getting out my kitchen ladder.

So now, you can picture me perched on the chair, allowing my mind to wander, writing away. Blogging.

Sunday, January 20, 2008

Chinese Meatloaf and the Pig Story


When my DH was still working - this has been more than 10+ years ago now - Fay was one of the women who worked in the office (DH sold computer chips for Intel). She lived on the outskirts of our county on a small ranch. Her children were young teens then, and the family was active in 4-H. The H's stand for Head, Heart, Hand, and Health. It's a youth organization, centered mostly around farming or ranching families, along the lines of Boy Scouts and Girl Scouts, except the kids learn skills for raising livestock (like cows, sheep, chickens, etc.). They do service projects just like scouting does, but still the day to day work is all about farm projects.

Fay had a son who wanted to raise a pig. And usually, the deal is that the kids raise the animals, knowing from the beginning that they'll be sold at the County Fair. Or at a livestock auction. So Fay offhandedly mentioned to DH that her boys were going to be selling a pig - their pig - at the Fair that summer. She also told us that we'd be paying a fairly premium price for the pig, but would we be interested in buying a half or a whole pig? She explained that the pig was mostly hand raised, and that part of the price is tax deductible somehow. Her son would be caring for it from day one on their ranch, the best feed, exercised well, pens cleaned out, etc. We talked it over, and Cherrie and I agreed to buy a half a pig. Fay would buy the other half. We signed up to buy it in the Fall when the pig was a little piglet. Months and months went by, and I'd forgotten all about this until one day Fay phoned to tell us that the pig was going to the Fair the next day. Oops. And that we would need to pay up in full right away. That's when we learned how BIG the pig was. Something like 400+ pounds. Somehow I'd pictured a sweet little, demure thing, maybe 100 pounds or so. Ah well. Live and learn. Pigs are not hogs, but they're gosh darned BIG.

The next day Fay phoned with the price and Cherrie and I mailed our checks immediately. Meanwhile, we needed to decide how we'd like to have the pig butchered - well, not how exactly, but what kind of cuts. We were faxed a page from the butchering firm, and we looked it over carefully to decide on chops, ribs, roasts, breakfast sausage, Italian seasoned sausage, plain ground pork, even hams smoked or raw, and bacon. We needed to specify how much of each. Of course, some things we didn't know - like how many pounds of baby backs there are in a half a pig. It was quite perplexing figuring that out. We faxed back the page, and they told us to come pick it up a few days hence, depending on the smoke house schedule. The 4-H group used a company almost in Northwest Riverside (that's about 50 miles away), out in the boonies, to do the butchering.

THEN, we got a note from Fay's son, including the tax deduction information, and he thanked us for buying PETUNIA. Oh my. Petunia. When we heard her name was Petunia, we wanted to back out. To say no, you can't have butchered Petunia! How could we possible buy a slaughtered pig with the name of Petunia? Sounds inhuman. Like you're destroying a famous cartoon character. But we had to - after all, we'd agreed to do this and we'd already paid for it. It was too late, of course.

For several years we bought an animal from Fay's son and one of us had to drive out to this butcher, with the car filled with ice chests. It was always summertime, so we needed to keep the stuff cold. They did freeze all the meat for us - that is a nice service - and it was all labeled well. Cherrie and I figured out which was which - hers and mine - and we began enjoying the pig. PETUNIA. <very big, sad faces here> I think Petunia was the very best tasting pig we had. For a couple more years we shared another pig. Cherrie bought a half by herself one year. His name was Tootsie Roll. Fay's sons also raised lambs a couple of times too. Generally, with whatever kind of meat, we used the nice cuts first, seemed like. The chops, the roasts. Even the Italian sausage. Unless we used the ham prior, for a special occasion, it usually waited until Easter to be served. Some years it was too salty for me, so in subsequent years I asked for less smoking, less salt, which the butcher was kind enough to accommodate.

So all of this story is leading up to how this recipe came to be. Cherrie had somehow, one year, ordered a LOT of ground pork. I mean a lot. We learned over the years what we preferred - the chops, roasts, even the ribs, not so much the hams or the numerous packages of seasoned sausage. We could order the ground pork in whatever sized package we wanted - I always ordered in one-pound ones. But they often got rolled to the back of the shelves (the freezer) and began to accumulate. There are only so many recipes you can use with pounds and pounds of ground pork. Unseasoned, fairly lean, but still, it's ground pork. The only constant was meatloaf. But usually that's a mixture of beef, veal and pork, or some semblance of such. Veal is not very accessible these days and way too pricey anyway, so basically you're down to ground beef and ground pork (or you could add ground turkey or chicken too). So, really, how much pork can you use up in ONE meatloaf. Two pounds maybe. When you have perhaps 25 pounds of ground pork in the freezer, that's a heck of a lot of meatloaf.

So, Cherrie raved about this recipe for Chinese Meatloaf, and she was delighted because the single recipe used a full pound of ground pork. She'd found the recipe in the Los Angeles Times (this has been years and years ago, now, and it's not available online). She's changed it just a bit, but mostly it's the original recipe: ground beef, pork, a lot of Napa cabbage, cilantro, fresh ginger, Asian seasonings, and some Hoisin sauce on top. I'd gone online to see if I could find the recipe, and did, but mostly found recipes for a meatloaf using lots of cream soup cans and bean sprouts. Yuck. This version is ever so much more authentic and tasty.

Cook's Notes: Cherrie has added another cup of Napa cabbage to her version (the one below), and she likes to put a bit of Hoisin on the top of the meatloaf when it first goes in the oven. Not much, but about 2 tablespoons. You'll want to use a large baking dish, like an oval or round Pyrex. Mold the meatloaf into the dish so it has space around the sides to exude the juice. The meatloaf generates a lot of liquid, so make sure it's high enough sided that it doesn't spill over. Halfway through the baking, you'll want to pour off the fat. I suspect a lot of the liquid is juice from all the cabbage, but still, you'd like it removed since the fat is swimming in that water anyway. Then when the meatloaf is done, smear the top with a bunch more Hoisin sauce, because that's the part you crave (like the ketchup part on a traditional American meatloaf). The meatloaf makes a somewhat soft texture (from all the cabbage), so let it cool for a bit before slicing and serving. She serves it with basmati or jasmine rice in which she's shaved some carrots, and a green salad to which she adds some kind of citrus, like Mandarin oranges from the can, or some wedges of fresh orange or tangerine. Thanks Cherrie, for sharing your great recipe.

Chinese Meatloaf
Recipe: adapted from my friend Cherrie S.
Servings: 8
1 pound lean ground beef
1 pound ground pork
5 cups Napa Cabbage -- chopped
1/2 cup cilantro -- minced
1/4 cup ginger root -- minced
1/2 cup green onion -- minced
1 tablespoon salt [next time I'll use less, probably 2 t.]
2 tablespoons hot chili sauce
2 tablespoons sesame oil
1/4 cup soy sauce
2 large eggs -- beaten [I might use 3]
4 tablespoons Hoisin sauce
1. Preheat oven to 350.
2. Combine beef, pork, cabbage, cilantro, ginger, green onions, salt, chile sauce, sesame oil, soy sauce and eggs in bowl and mix well. Press into a large baking dish (with sides). Spread about 2 tablespoons of Hoisin sauce on the top of the meatloaf.
3. Bake for 1 hour or up to 90 minutes, removing halfway through to drain off the fat.
4. Remove from oven and brush top and sides with additional Hoisin sauce. Allow to sit for 10-15 minutes before cutting and serving.
NOTES : The Napa cabbage seems like a lot, and it does generate a lot of liquid, but it adds a wonderful lightness to the meatloaf. Don't omit it.
Serving Ideas : Serve with rice (white or brown) with some grated carrot in it. Also with a green salad with some citrus in it.
Per Serving: 392 Calories; 29g Fat (67.0% calories from fat); 23g Protein; 9g Carbohydrate; 1g Dietary Fiber; 137mg Cholesterol; 1581mg Sodium. Exchanges: 0 Grain(Starch); 3 Lean Meat; 1/2 Vegetable; 4 Fat; 0 Other Carbohydrates.
Printer-friendly recipe, click title at top.

Saturday, January 19, 2008

Herbs in a Pantry


My pull-out herb racks.
One of the blogs I read regularly is The Perfect Pantry. Lydia is a very accomplished writer (she's a professional food writer) and composes the funniest postings. I just love reading her blog. A week or so ago Lydia included a post (actually two posts - here's the first one, and here's the second one - it started from a comment from one of her readers named Arlo) about herb and spice cupboards. In this case, it was a pantry box, and the story of its evolution, from the time this reader was a young woman to now, as a middle-aged person, I would guess. It was a very interesting tale full of nostalgia and a bit of heartbreak, and I could certainly identify.

Herbs and spices in and of themselves have been vital in the development of my own cooking style. As a young woman I certainly didn't know a lot about them, except the most common ones - thyme, rosemary, tarragon, oregano, savory, and the regular spices: cinnamon, ginger, nutmeg and cloves. Every time I encountered a recipe with a new herb or spice I bought it. And over the years I've collected a bunch of different bottles and jars, cans, packets, plastic bags, etc. Some of the bottles have stories attached - where I bought them - or a gift from someone in their world travels. I've replaced most of my herbs during that time, so everything I have, mostly, is new. The adage about replacing your herbs annually? Phooey. I keep mine more like 5-8 years, and if it looks kind of old, I just use a little bit more. When we remodeled our kitchen a year ago I had seen these nifty pull-out racks in a magazine. Had to have them. Heaven knows how much they cost. I had to have them, though. They are on either side of my range, so they're handy to the cooktop when I need them.

In the photo above, the left one shows my herbs alphabetized (thanks to my friend Joan, who helped with this when we moved back into our remodeled kitchen) from A to F, with a few herb mixtures on the bottom shelf. The right photo is G to Z, with a couple of empty bottles. I also have another cupboard that holds the very smelly herbs - the curries, the turmeric, etc. The cupboard door stays closed 99% of the time, so the aromas don't pervade the kitchen.
I buy nearly all my herbs and spices now, from Penzey's. I've mentioned this before, so won't go into detail. They have stores around the country - not many, but a few, and I have read there is one up near the Los Angeles airport. In Torrance, on Hawthorne Blvd.

This cute little wooden box lives next to my range, and contains my most used items. The two red things are my newest, and most favorite toys. Battery-operated pepper and salt grinders. I bought mine at least a year ago or more, but I purchased one as a gift for my daughter before Christmas - at Bed, Bath & Beyond (the product doesn't show up online there) for about $20 apiece. I found it online at another retailer for $26. They're made by Trudeau, and is called the Graviti. The gizmos only come with pepper in them, but just empty out the pepper and replace with coarse salt if you want one of each like I do. You can adjust the grind with a small knob on the top.
In the right hand (front) cubbyhole are two small stackable plastic containers of thyme and oregano, probably my most-used herbs. They're available from The Container Store. In the back pockets of the box are: sherry wine vinegar from Spain, some fancy sea salts from Michael Chiarello and my favorite Fini balsamic vinegar with a pour spout on top. Standing up behind are agave nectars and fancy balsamics that haven't been put away since before Christmas.
So, okay, what does YOUR herb an spice cupboard look like?

Friday, January 18, 2008

Eat Your Fiber (Refrigerator Bran Muffins)


Think back to the 1960's. We were just starting to eat more cereal, rather than bacon and eggs every morning. Grape Nuts. Corn Flakes. Oatmeal hadn't hit the big time yet as a cholesterol fighter. We didn't even know about cholesterol back then. We hardly knew about yogurt - it was a kind of "health food" as I recall. But the cereal manufacturers had produced both All-Bran and Raisin Bran, so sure enough, somebody came up with a variation other than consuming it in your cereal bowl. I'm sure this recipe made the rounds of most home cooks of the era. It may be a recipe devised by Kellogg's for all I know, although I got it from a friend of my mother's. It originally called for All Bran, but it was too, too much fiber and not all that tasty, so I substituted the bran flakes instead. Much improved and have made them that way ever since. You mix it up in a big bowl, refrigerate it and plop batter into a muffin tin in the morning. Voila. Fifteen minutes later you have freshly baked muffins. The batter keeps for weeks in the refrigerator. The marketing of the day convinced us this kind of muffin was healthy for us because it contained bran. And raisins. Never mind the sugar - it was considered an energy source. That mentality hasn't changed - just look in the case at any Starbuck's and you'll see these humongous bran muffins - probably 500 or more calories and loads of fat. Hmmm.
Cook's Notes: Doctor these up with some additional dried fruits (dried cranberries, for instance, or chopped up apricots or some crystallized ginger) if you'd like some variety. I added some more golden raisins because the brand of Raisin Bran flakes was a little light on the fruit, in my opinion. It's wasn't Kellogg's, but somebody else's label. You can also add some cinnamon and ginger to the batter too, if you'd like a spicy variation. I substituted 1/3 Splenda for the sugar, and these are not overly sweet even so. If you like a sweeter muffin, add another 2 to 3 tablespoons of sugar. After making one batch of these the other day, I decided they were not quite sweet enough (I'd put in less sugar than called for). So, I added about 2 T. sugar to the wet batter, stirred it around a bit, then once plopped into the muffin tin, I sprinkled just a tad of sugar on top of each muffin. Oh. Very good. I'll do that again because the ouside of the muffin had just a bit of caramelization from the late-added sugar. I liked the texture.

These aren't going to wow your next breakfast. But, they're just plain and good. DH decided that our plain (unflavored, but sweetened) yogurt was just wonderful with these, and indeed they are. Something about the creaminess of the yogurt - like eating cream cheese with them, or something.

Refrigerator Bran Muffins
Recipe: Mary Wilfert, a San Diego friend from the 1960's
Serving Size : 30 (small)
3 cups Raisin bran -- cereal
1 cup boiling water
2 whole eggs -- lightly beaten
2 cups buttermilk
1/2 cup vegetable oil
2 1/2 teaspoons baking soda
1/2 teaspoon salt
1 cup sugar
2 1/2 cups flour
1. Preheat oven to 425°.
2. In a large bowl mix bran cereal with boiling water, stirring to moisten evenly. Allow to cool, then mix in eggs, buttermilk, oil and stir well. Stir together (separately) the soda, salt, sugar and flour, then stir into the bran mixture.
3. Scoop batter into muffin tins and sprinkle tops with just a little bit of sugar. Bake for 20 minutes (small muffins). If using larger muffin tins, bake about 25 minutes.
NOTES : This whole mixture will keep in the refrigerator for several weeks if you want to bake them fresh in the morning.
Per Serving: 123 Calories; 4g Fat (30.9% calories from fat); 3g Protein; 19g Carbohydrate; 1g Dietary Fiber; 15mg Cholesterol; 199mg Sodium. Exchanges: 1/2 Grain(Starch); 0 Lean Meat; 0 Fruit; 0 Non-Fat Milk; 1 Fat; 1/2 Other Carbohydrates.
Printer-friendly recipe, click title at top.

Onion Goggles Revisited


Someone uploaded a comment to my posting about Onion Goggles, and asked about where to buy these, so am writing a separate post just about these things. A quick explanation - the darker curved strip you can see on the inside of the lenses is a soft foam, and it fits snugly against your face. Keeps all fumes from reaching your eyes. All. These things work like a charm. I paid $19.99, I believe. They may be available at your local cookware store (I bought these at Great News in San Diego). They are available online at:
Amazon, in pink, black and white. For $17.99, plus shipping, of course.
Dynamic-Living, in green/black, for $19.99, plus shipping.
Or, read a discussion of them over at Chowhound.
I read several discussion groups about the onion goggles. Some people speculate that they won't work (those who have never tried them). People who wear contacts are less bothered by the vapors. You can also wear swim goggles, which should do the same thing. One reader keeps a cheap pair in her kitchen drawer. Other people claim the onion goggles don't work. But, for me, these absolutely DO work, and my eyes are very sensitive to the sulphur vapor from onions. Enough said.

Thursday, January 17, 2008

Wild Rice Salad


This is another recipe from the cooking class the other day. We had a short discussion about this salad at the December cooking class, when one of the members mentioned it, that she orders it every time she goes to a restaurant here in Newport Beach, called Gulfstream (no website, but it's on the corner of Pacific Coast Highway and MacArthur and you can read lots of reviews of the restaurant if you search online). It's a very lovely, upscale restaurant, and quite pricey. I've never been there, although when it first opened I did go in and read the menu. I don't know why I haven't been back to try it, but just haven't. But this salad definitely will encourage me. Our instructor, Tarla Fallgatter, loves to try to dissect a restaurant dish, and she had the salad there, promptly came home and worked out her version. We all really liked it. A lot.
I don't seem to make rice salads much. I don't actually make many carb-rich dishes anymore since my DH and I both prefer to limit our carbs. But this tasted so darned good, I think I'll have to. What made this salad was the dressing. Tarla explained that she prefers to use a fruit-based vinegar on salads such as this one. She said we could substitute champagne vinegar, but she finds it much more acetic (meaning too acetic for her tastes), so encouraged all of us to run right out and find some pear vinegar. Lo and behold, I just happen to have some pear vinegar. If any of you read my posting about the contents of my oil and vinegar cupboards, you'll understand why I say that. I'd have been amazed that I didn't have it. Sure enough, I have a bottle (unopened, I might add) of Sparrow Lane D'Anjou Pear Vinegar. I think I bought it in Healdsburg last spring at a cute eclectic market on the plaza.
Cook's Notes: Tarla liked adding the dried blueberries, but some others in the class thought they were too sweet. So, use dried fruit of your choice. She also suggested that if the red onion is really pungent (you'll know because you'll tear up more from an older, sharper onion) soak the onion in water for about 5 minutes before adding to the salad. Be sure to use fresh, raw corn. Not frozen corn. But note there's only 1/4 cup of corn in this recipe, so that's only one ear or less.

Wild Rice Salad
Recipe: Tarla Fallgatter, cooking instructor
Servings: 6 (small)
SALAD:
1 cup wild rice
1/2 cup basmati rice
1/4 cup corn kernels -- fresh
1/4 cup dried blueberries
1/4 cup red onion -- minced
1/4 cup pecans -- toasted
3 tablespoons Italian parsley
DRESSING:
2 tablespoons pear vinegar -- or Champagne
1 tablespoon Sherry vinegar
1 teaspoon mustard
1 pinch curry powder
4 tablespoons olive oil salt and pepper to taste
1. For this salad, you want 1 cup of COOKED wild rice and 1/2 cup of COOKED basmati rice. Proportions shown in the ingredient list probably aren't accurate.
2. Mix salad ingredients together in a bowl.
3. Dressing: whisk ingredients together and pour over rice mixture. Serve.
Per Serving (assuming you eat all the rice and wild rice listed in the ingredient list, which you won't, in this dish anyway): 293 Calories; 13g Fat (38.4% calories from fat); 6g Protein; 40g Carbohydrate; 3g Dietary Fiber; 0mg Cholesterol; 24mg Sodium. Exchanges: 2 Grain(Starch); 0 Lean Meat; 0 Vegetable; 1/2 Fruit; 2 1/2 Fat; 0 Other Carbohydrates.
Printer-friendly recipe, click title at top.

Wednesday, January 16, 2008

Gingerbread Pudding Cake


When I tell you you absolutely MUST make this, I'm not kidding. It's simple. Really simple. And oh-so-very delicious. It probably looks like a pile of gooey something with whipped cream. Well, it is, sort of. I've enjoyed pudding cakes for years, and was surprised at the cooking class that was held at my house yesterday, that lots of people don't know about pudding cake. They'd never heard of it. Never seen it. I've made both chocolate and lemon pudding cake, but never gingerbread.

Pudding Cakes are different. Obviously, they're not quite a true cake, or a true pudding either. They kind of defy explanation. Online I didn't even find a very good definition about pudding cake. I went to my usual source, Harold McGee's On Food and Cooking, a fascinating tome about the chemistry of cooking. This is the first time I've struck out, not finding an explanation in his book. And, as I said, nothing online either. Nor in my cooking encyclopedia, nor Martha's Baking Handbook. Not even Dorie Greenspan. So, you'll just have to settle for my homespun explanation.

A pudding cake starts off with a cake batter. It's placed in a high sided ovenproof dish, then you pour boiling water (sometimes with butter added in this case) over the top. In the baking process, the cake part becomes a layer that kind of floats on top, and the hot water mingles with some of the batter and makes a pourable pudding underneath. You serve it warm to hot. Once it cools, the pudding part that made a nice puddle on the plate when you served it (as in the picture at top), becomes a thicker pudding. Which is why you want to serve it warm. The whole thing is some kind of chemical magic.

Probably the most common pudding cake is lemon. Southerners here in the U.S. think they own lemon pudding cake, I think. It's a regular staple in the Southern diet. When I searched online I found several recipes with Southern roots. The one I've always made came from a friend in England. So maybe its origins are English. I simply don't know. Maybe somebody who reads my blog will know! Or will have some kind of cooking encyclopedia with an explanation.

Anyway, the teacher, Tarla Fallgatter, used my home for the cooking class for this month. The hostess gets to choose the theme, and I opted for soups and chowders. And she always makes a dessert too. Tarla had mentioned that she'd made this dessert at several classes recently and it was met with lots of raves. Mine are now added to it.

Cook's Notes: Tarla cautioned us that you don't want to overbake the cake. But it can't be underdone, either, or it will be gummy. So I've included a photo of the top of the cake when she removed it from the oven (below). It had large cracks in the cake, but when you jiggled the baking dish, the cake was one solid piece and cooked through (no soft or slushy part in the middle, which was the last part to cook), and the cake did move slightly in the dish. If you aren't fond of all the gingerbread spices, you can halve them. Tarla had doubled them because she likes the spicier version. I did too.


Gingerbread Pudding Cake
Recipe: Tarla Fallgatter, cooking instructor
Serving Sizes: 8
CAKE BATTER:
1 1/4 cups all-purpose flour
2 teaspoons ground ginger
3/4 teaspoon baking soda
1 teaspoon ground cinnamon
1/2 teaspoon ground nutmeg
1/2 teaspoon ground allspice
1/2 teaspoon ground cloves
1/4 teaspoon salt
2 ounces unsalted butter -- room temperature
1/4 cup sugar
1 large egg
1/2 cup molasses -- mild
1/2 cup water
3/4 cup brown sugar -- packed
WATER MIXTURE TO POUR ON TOP:
1 1/2 cups hot water
5 tablespoons butter -- melted
TOPPING:
1 cup heavy cream -- whipped, with sugar and vanilla to taste
1. Preheat oven to 350. Butter an 8x8x2 glass baking dish, or other high sided casserole dish of similar size.
2. Mix dry ingredients together. Beat butter and sugar in a food processor, then add egg. Add molasses and 1/2 cup water ad pulse in. Pulse in dry ingredients just to blend. Transfer mixture to the buttered baking dish and sprinkle top with brown sugar.
3. Melt the 5 T. butter in a saucepan and add the 1 1/2 cups hot water and bring to a boil. Cool just slightly. Carefully pour this mixture over the cake batter.
4. Bake until the gingerbread is cracked on top and a toothpick inserted into the center comes out clean, about 45 minutes. Do NOT overbake. Allow to cool for 15-20 minutes, then scoop warm pudding cake, with the sauce it makes, into shallow bowls and serve with whipped cream.
Per Serving: 431 Calories; 25g Fat (51.0% calories from fat); 4g Protein; 50g Carbohydrate; 1g Dietary Fiber; 102mg Cholesterol; 294mg Sodium. Exchanges: 1 Grain(Starch); 0 Lean Meat; 0 Non-Fat Milk; 5 Fat; 2 Other Carbohydrates.

Printer-friendly recipe, click title at top.

Tuesday, January 15, 2008

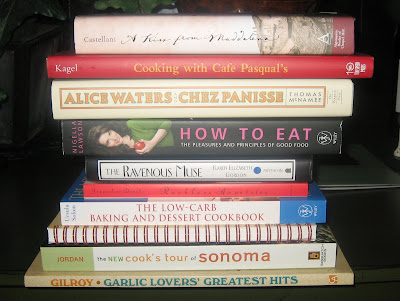
My In-Box of Books


These aren't all "new" books. Well, they're all new to me. Some were received as Christmas gifts (the top four, all from my Amazon wish list) and the remaining ones I bought myself at a used bookstore in Placerville, California. Every time we go to Placerville to visit our daughter and family, I try to pop in to this great little shop called The Bookery on the old Goldrush-era main street. I always pause to pet the gray-haired dog who curls up on the dog bed near the front door, sometimes talk to the resident cat who lives on a shelf behind the cash register, then I make a beeline for the cookbook section. I've always been amazed at the quality of the books in this store - the cookbooks that is. For a small used bookstore, it's always busy, and they have a convenient low stool in the cookbook area, which I use as I peruse the books.
Actually, my stack of books was higher than shown in the photo. Out in front of the store they had a table and a trolley heaped with Christmas books, all half off the marked price, which usually is 50% of the list price. It was the day before Christmas and they wanted to get rid of them! So I got those for 25% of the list price, the flyleaf price. There were some very cute books in that section, including some children's books I'll give to our newest grandson next year. They've been relegated to my Christmas stash way upstairs.
But, back to the bookstore. Sorry, I digress. This time I was there I was told, as I was checking out, that one of the owners (who wasn't there) has a huge, I mean HUGE, cookbook collection. Numbering in the thousands, they told me. No WONDER the bookstore has a large cookbook collection. I suppose she passes on her discards to the store shelves. I wish I knew her. Maybe more of her discards would grace my shelves.
Although I already have a serious cookbook problem, as I've divulged here before. I already have bulging cookbook shelves. Now with these new books, I have no room. This stack, pictured above, is sitting on a piece of furniture at the moment in the kitchen/family room area. The Alice Waters biography has been removed and is sitting by my kitchen placemat. Always available for a little look-see if I have a spare moment while I'm eating a meal.
Two of the stack are novels (with one of those a food mystery). Actually both have disappeared to the upstairs library, where I keep all of my fiction. I have much more library storage in the upstairs office, where I spend several hours every day, mostly on my desktop computer. But for now, I'm enjoying just looking at this stack, getting ready for more pleasurable minutes of cookbook reading.

Monday, January 14, 2008

Mulligatawny Soup


Oh, I do adore soups. I'm sure I've gone on and on before about why I like soups - just the simple ease of them, they warm the tummy, great to freeze for another night when I don't feel like cooking, and you don't have to make all those different things . . . a protein, a vegetable, a salad, maybe a carb . . . you get it all right in the pot. Sometimes I serve soup with a side carb like a biscuit. Rarely do I make a salad, because a green salad doesn't always seem to go with a hot soup. Maybe a half a sandwich goes better with it, but I had had a half a sandwich for lunch. So, since there's rice in this soup, the meal is complete just the way it is.

I remember reading this recipe in a magazine back about 1971. It was probably Family Circle or something similar. I was still experimenting with curry powder back then, and this one doesn't have all that much curry in it, so it just has a faint hint of it. But it was the addition of apple that intrigued me. Somewhere around the same time I'd encountered a savory cold apple soup that became a regular on my summer entertaining menu. One of these days I'll post that one. I really enjoyed making things that surprised people. You just don't expect apple in a savory soup.

This soup comes together in a jiffy, actually. I had chicken √, celery √, carrot √, onion √, chicken broth √, rice √ and the spices √. Over the years I've adjusted the recipe quite a bit - more chicken, more curry, more onion, more carrot, more thyme. But the bones of the recipe remain the same. We went to see Atonement, the movie, the day I made this. It's a kind of a downer, although exceptionally well done. It made me want to get comfortable in front of the fireplace and be cozy. Soup fits in perfectly.

Mulligatawny Soup has its origins in India. Here's what wikipedia had to say about it:
  • Mulligatawny is a type of Anglo-Indian soup. It is regarded as the national soup of India. A literal translation from Tamil is "pepper water" ('Millagu' is pepper and 'Thanni' is water). Despite the name, pepper itself is not a vital ingredient. Rice and noodles are commonly served in the soup; the real dish the Anglo-Indians call "pepper water" is closer to Tamilian rasam (pronounced Russ-um) than mulligatawny. Variations differ very much. Sometimes, the soup has a turmeric-like yellow color and is garnished with parsley and chicken meat, and is more soupy, which takes on its Anglo-Indian adaptation to be a thick, spicy meat soup.
Interestingly, curry is not a specific ingredient listed above. But think India-n food, think curry. I really like the addition, whatever version this is. And it's very low in fat and sodium, providing you use low-sodium chicken broth. You could eliminate the rice too, if you wanted to make this a low carb meal.

Mulligatawny Soup
Recipe: adapted from a magazine article, c. 1971, but I have no notes about it.
Servings: 4
1 whole onion -- diced
2 whole carrots -- diced
2 stalks celery -- diced
2 tablespoons olive oil
1 1/2 tablespoons flour
2 teaspoons curry powder - I prefer about 1 tablespoon
4 cups low sodium chicken broth
1 cup water
1/4 cup apple -- diced - I use half an apple
1/2 cup rice
1 cup cooked chicken -- diced
1 teaspoon salt
1/4 teaspoon pepper
1/8 teaspoon thyme
1/2 cup fat free half-and-half
1. Heat olive oil in a medium-deep pan, then add onion, carrot and celery. Stir and heat the vegetables, then sprinkle the flour over them, adding the curry powder as well. Cook for about 5 minutes.
2. Add chicken broth and simmer for about 20 minutes. Add rice and continue to cook for about 10 more minutes. Add half of the apple and seasonings and simmer for about 15 minutes.
3. Just before serving, add the remaining apple and the chicken, plus the half and half and heat until the soup just barely comes to a simmer again.
NOTES : One of the keys to this soup is the apple - you just don't expect it in a soup. It's important to use a tart, firm apple, not one that will turn into mush (so use a Pippin or Granny Smith only).
Per Serving: 298 Calories; 8g Fat (25.0% calories from fat); 19g Protein; 35g Carbohydrate; 3g Dietary Fiber; 15mg Cholesterol; 1129mg Sodium. Exchanges: 1 1/2 Grain(Starch); 2 Lean Meat; 1 1/2 Vegetable; 0 Fruit; 0 Non-Fat Milk; 1 1/2 Fat.
To print a PDF recipe, click title at top.

Sunday, January 13, 2008

Sauteed Chicken with Red Wine Vinegar Sauce


When my DH says this is a keeper, I listen up. He doesn't say those words all that often. He enjoys my cooking and does tell me all the time how much he appreciates this dish or that. But those particular words just don't come out of his mouth frequently. I heard them for this dish. He was intrigued enough by the appearance to ask me what was in it, how I cooked it. He keeps thinking that one of these days when he takes a several-day sailing trip on our boat, going out to Catalina, or one of the other islands within sailing distance of our shores, that he's going to cook a nice dinner for his crew. (I've probably mentioned it before, but I don't go on these jaunts because I get deathly seasick, or I'm so drugged up with Dramamine that I don't function much, or suffer from very blurred vision if I use the scopalamine patch. All in all, I just don't go. DH reminds me occasionally that he didn't marry me for my sailing abilities. That's for sure. He also didn't marry me for my dancing style, either, but that's another story.)

So anyway, he was curious about the chicken and nearly licked the plate. The recipe came from a restaurant out in our California desert - a French place called Cuistot. We've eaten there several times, and enjoyed the food. A reader wrote into the Los Angeles Times (December 12, 2007) asking them to get the recipe, which the chef provided. I believe the article said this is a common bistro kind of preparation. It's easy - from start to finish it took me about 45 minutes, with 25 of those minutes the chicken was in the oven. You heat the oven to a phenomenal 500 degrees F. Yikes. But it works. If you have a heavy-duty skillet that can withstand that kind of heat, go for it (that's what the recipe indicates). I wasn't sure enough to subject my Look brand nonstick skillet to that temp, so after browning the chicken pieces I popped them in an ovenproof pan. Then I deglazed the browning skillet and made the sauce while the chicken was baking. It sped up the dinner process since I was able to take the chicken directly from the oven to the plate and spooned sauce on it immediately with a bit of the drippings from the blazing hot pan.

This is the kind of dinner you could throw together quickly - providing you have shallots on hand and fresh tomatoes. Most home kitchens would have the garlic, butter, red wine, vinegar and chicken broth. I forgot to add the garnish in my haste to get the plates on the table.
Cook's Notes: I diverged just a little - I sliced the garlic (as usual, I didn't read the recipe real well when I started - sheepish grin here), but discarded it after baking, since it was for flavor, not eating anyway. I also used chicken thighs and breasts, because that's what I had on hand. Surely in my cache of vinegars I have cabernet vinegar, but in my haste I decided not to hunker down on the floor perusing for bottles behind bottles. And, I cooked the sauce longer than I should have - I kept reducing the liquid, but I'd already put in the tomatoes, so they weren't just flash fried and still fresh-looking. Tasted great, though. We had the leftovers for dinner last night. DH again mentioned this chicken was "wow" in his book. We both agreed, though, that more sauce is needed, so next time I'll double that part.

You see, I was late getting home - went to see Kite Runner at 3:55 and didn't get out of the movie until 6:15. And, oh my goodness, was that a movie! I'd read the book a year or two ago, right after it came out. The photography was excellent - even though it was filmed mostly in China. The bulk of the real story takes place in Kabul, Afghanistan and Pakistan, but it certainly looked authentic. The story is heart-wrenching to say the very least about it. Highly recommended. And, of course, the book is better, but I thought the movie was exceptionally well done.
So, after a 30-minute drive home, it was late for dinner before I even started. Bang, clang, and I served it in a jiffy. And now this will go into the KEEPERS file. DH even asked that the next time this is on the menu, he'd like to make it. Now that makes this a real red-letter dinner! He's never said that. Ever.

Sautéed Chicken with Red Wine Vinegar Sauce
Recipe: Cuistot Restaurant, Palm Desert, California, via the Los Angeles Times
Servings: 4
4 pieces chicken breasts -- skin-on chicken breasts or whole legs
Salt and pepper to taste
2 tablespoons butter -- divided
4 whole garlic cloves -- skin-on
2 tablespoons chopped shallots
3 tablespoons red wine
3 tablespoons red wine vinegar
1 cup chicken broth
2 whole plum tomatoes -- peeled, seeded and diced
Chopped chives or parsley for garnish
1. Heat the oven to 500 degrees. Sprinkle each piece of chicken lightly on each side with one-eighth teaspoon salt and a grind or two of pepper.
2. Melt 1 tablespoon butter in a large ovenproof skillet. Add the chicken, skin-side down, along with the garlic cloves. Sauté over medium-high heat, until the skin is golden brown, about 2 to 3 minutes. Turn the chicken and repeat on the other side.
3. Place the pan, with the chicken skin-side up, in the oven for 20 to 25 minutes until cooked through. The meat will be firm and the juices will run clear, and a thermometer inserted will read 165 degrees.
4. Remove the chicken from the skillet, cover and set aside in a warm place. Discard all but 1 tablespoon of the drippings from the pan, and return to the stove over medium heat. Add the shallots, cooking until they caramelize, about 2 minutes. Add the red wine and vinegar and cook until the liquid is reduced by half, a few minutes. Add the chicken broth and tomatoes and stir to combine; adjust seasoning. Whisk in the remaining tablespoon of butter, swirling to thicken the sauce.
5. Return the chicken to the sauce and heat 1 to 2 minutes until warmed through. Sprinkle with chives or parsley and serve immediately.
NOTES : Adapted from chef Bernard Dervieux of Cuistot in Palm Desert. The chef recommends Cabernet vinegar for the red wine vinegar in the recipe.
Per Serving (assuming you consume the chicken skin): 583 Calories; 33g Fat (52.7% calories from fat); 62g Protein; 4g Carbohydrate; trace Dietary Fiber; 201mg Cholesterol; 443mg Sodium. Exchanges: 0 Grain(Starch); 9 Lean Meat; 1/2 Vegetable; 1 Fat; 0 Other Carbohydrates.
Printer-friendly recipe, click title at top.